SAP invoice verification is important for both the supplier and the customer as it ensures accurate quantities and pricing of goods or services. SAP ERP has implemented various methods to process invoice verification through its materials management functionality. The image illustrates the process.
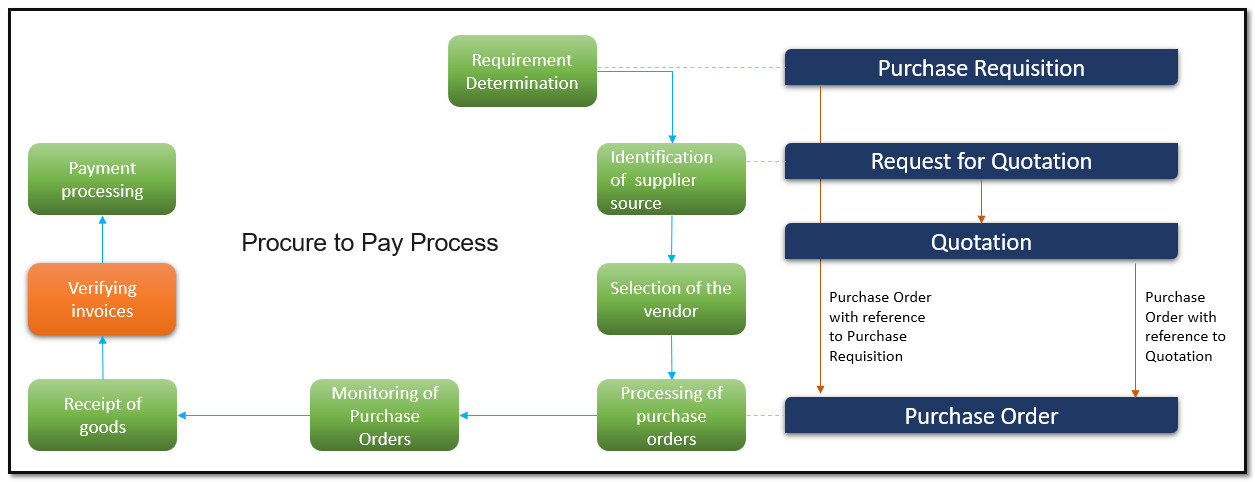
Figure 1 SAP Invoice Verification in Procurement Cycle
Let us explore the details of these methods and gain a comprehensive understanding of SAP invoice verification.
Introduction to SAP Invoice Verification
Once an invoice is received by the accounts payable department from a supplier, the invoice verification process begins. SAP utilizes the three-way match method, along with other procedures, to process the invoice.
Three-Way Match Method
The purchase order, goods receipt, and invoice are compared in order to ensure accuracy of information such as quantity and price.
After an invoice is entered into the system, a simulation can be done to compare it to the corresponding purchase order or goods receipt. This helps to identify any potential errors. If there are no differences, the invoice is then posted. If there are any discrepancies, a warning will be issued and payment may be blocked.
Invoice Creation
A vendor can choose between sending an invoice via fax, hard copy, or using EDI. Once the invoice is received, you can enter it into the SAP system using the transaction MIROor following the menu path:
Logistics > Materials Management > Logistics Invoice Verification > Document Entry > Enter Invoice
On the next screen that appears, you may be asked to enter a company code.
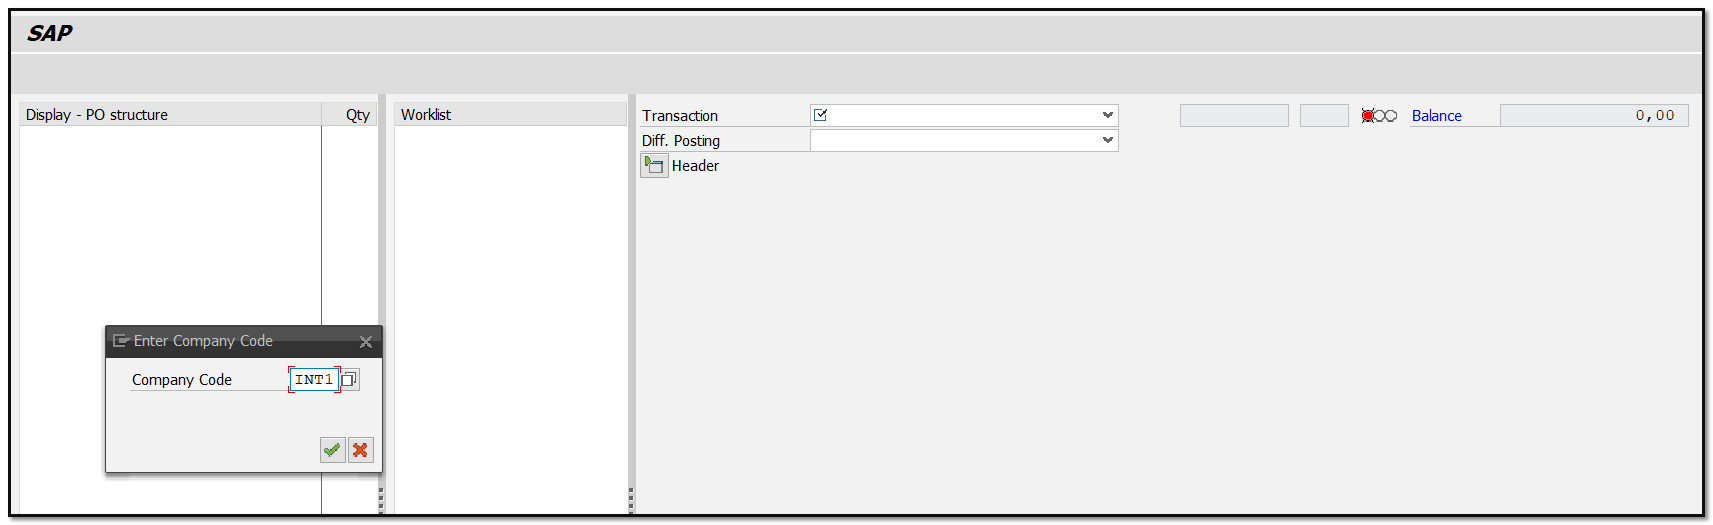
Figure 2 Logistic Invoice Verification – Company Code
Once you enter the company code, it will take you to the next window, titled Enter Incoming Invoice: Company code INT1. Here, the basic data tab of the header data section requires the following information: Invoice date, Posting date, Amount, and Tax code. Select - Calculate tax checkbox.
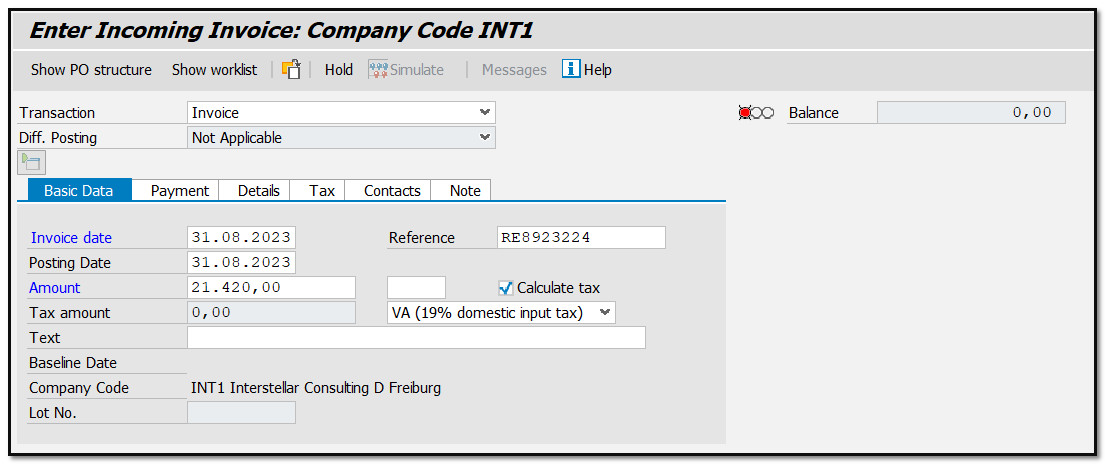
Figure 3 Logistic Invoice Verification – Basic Data
Please note the information on the top right side of the screen labelled Balance. It will be significant later on. At this point, the balance light is red, as shown in the following screenshot.

Figure 4 Logistic Invoice Verification – Balance
After the header data section, there is a tab named PO Reference. We need to fill in the necessary information by following these steps. Choose Purchase Order/Scheduling Agreement from the dropdown menu. The dropdown menu also displays other options that can be applicable in different situations.
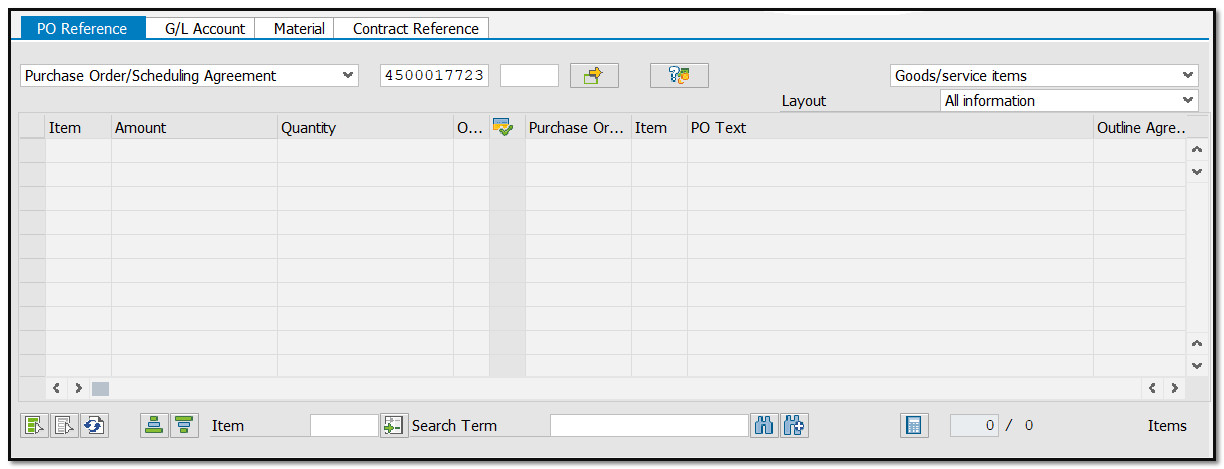
Figure 5 Logistic Invoice Verification – Purchase Order / Scheduling Agreement Selection
Enter your purchase order number and press Enter.

Figure 6 Logistic Invoice Verification – Purchase Order Number
The purchase order information will be loaded into the table, as shown in the screenshot below, with some updates highlighted in yellow.
- The tax amount has been updated in the basic data tab.
- The information regarding the vendor.
- The green light on the balance indicates that there is no price difference between the supplier's invoice and the customer's purchase order.
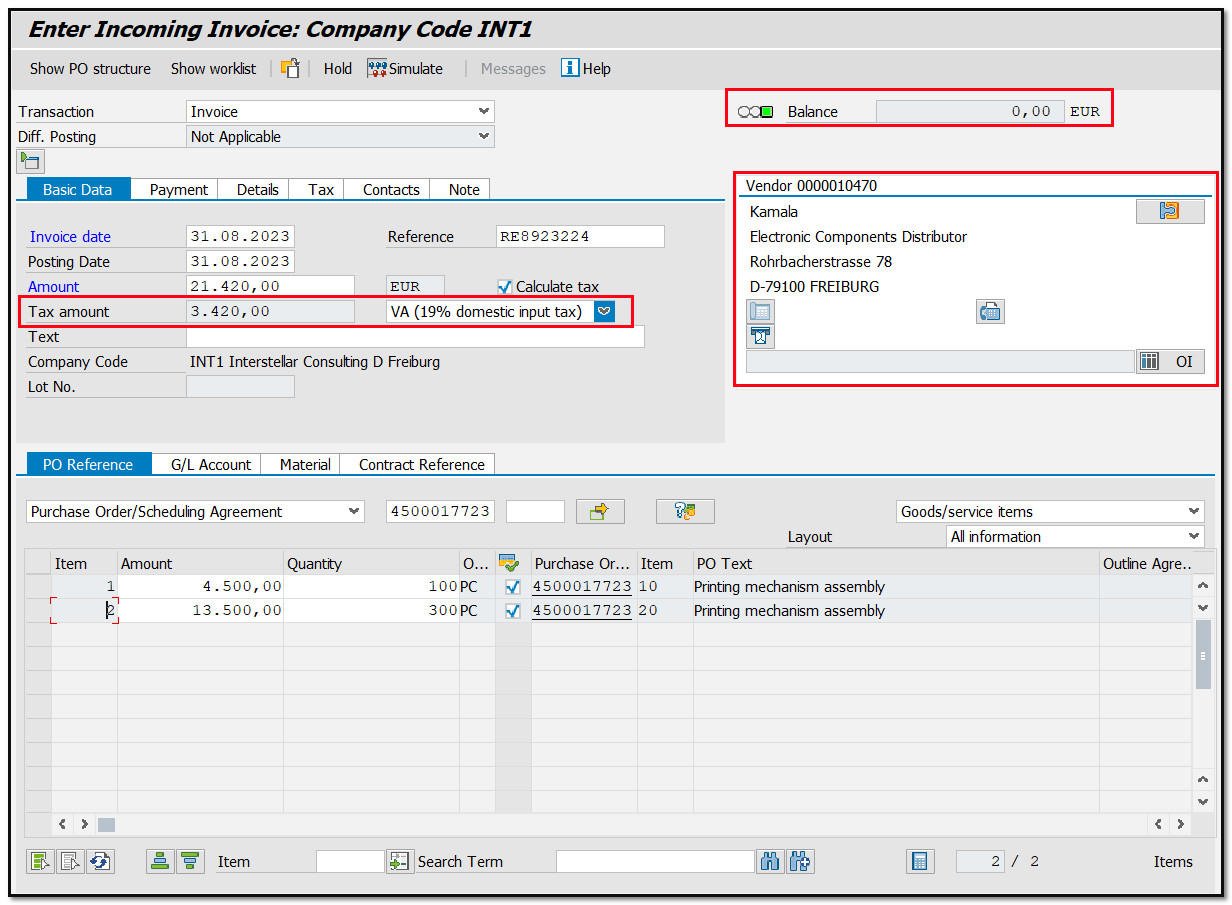
Figure 7 Logistic Invoice Verification with Reference to a Purchase Order
Next, click on the Payment tab next to the Basic data tab and enter: Baseline Date
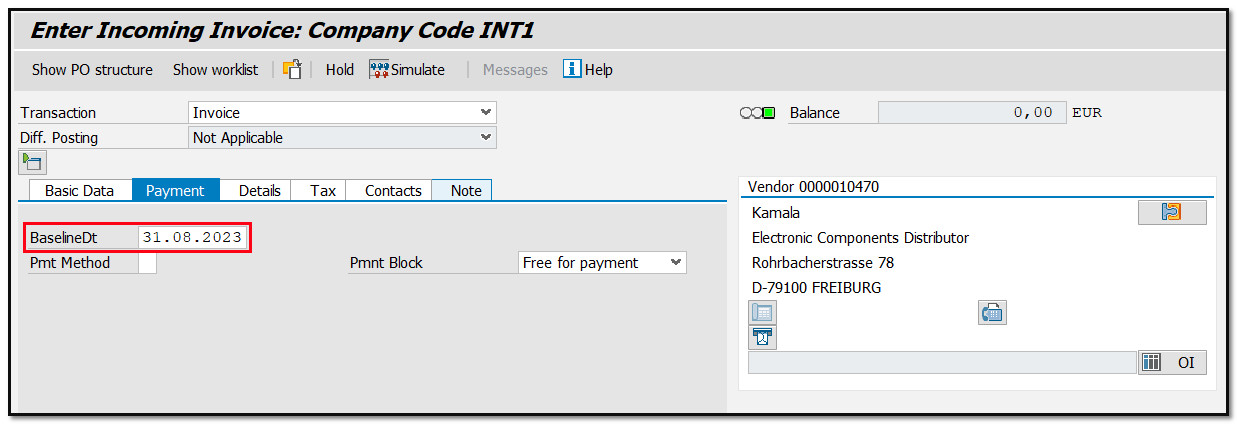
Figure 8 Logistic Invoice Verification – Baseline Date
Posting Simulation
It is possible to test posting of an invoice by simulating it. If the simulation shows that the invoice cannot be posted, it will generate error and warning messages for the user. To access the simulation interface, click on the Simulate button.

Figure 9 Logistic Invoice Verification – Simulate Button
Invoice Posting and Invoice Document Display
The illustration balance is currently zero, indicating that there are no discrepancies between the invoice and the purchase order. This is represented by a green light indicator next to the Balance field. To save our invoice and generate a document, click on the Save button.
You can display this document, using the transaction MIRO. Choose Invoice Documents, then Display, and enter the Invoice Document Number and Fiscal Year.
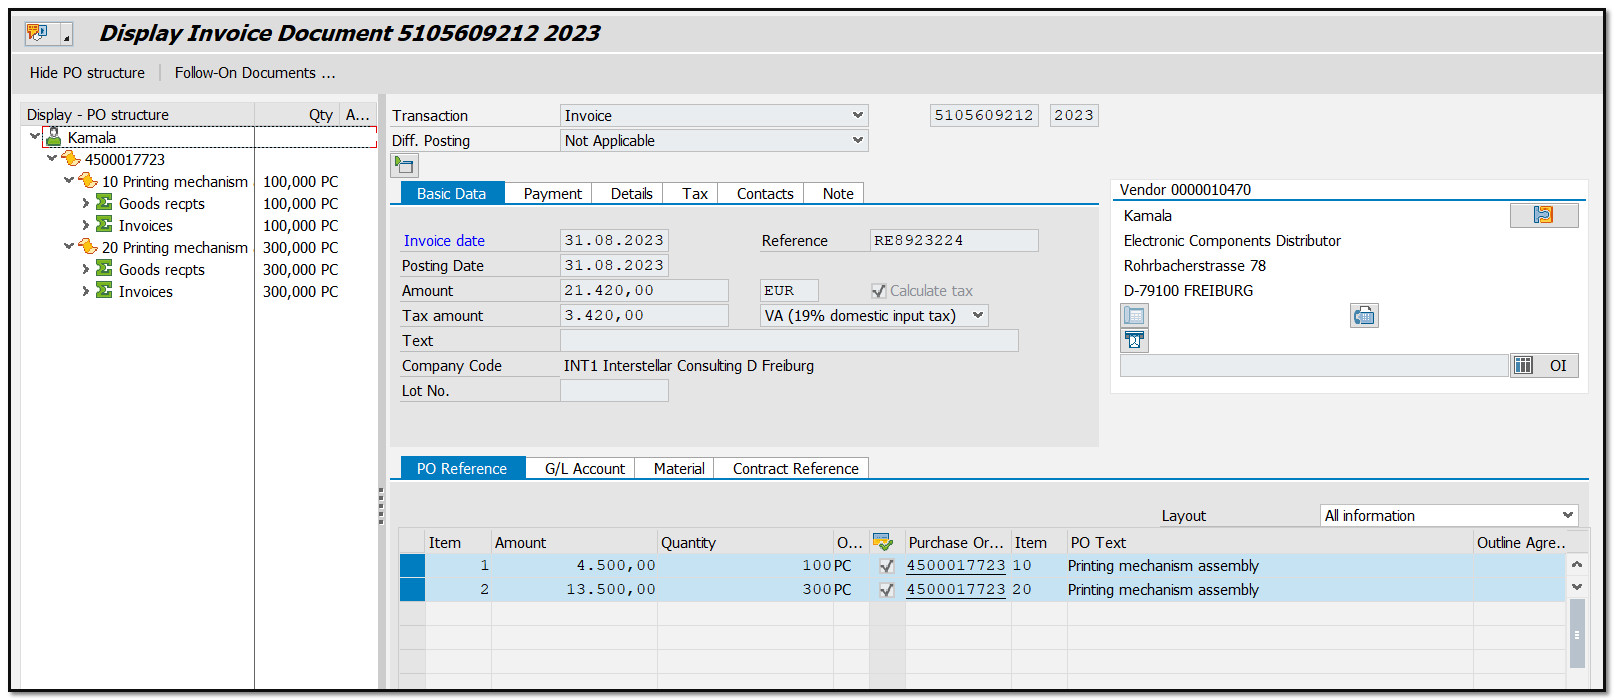
Figure 10 Invoice Document with the PO Structure
The three-way match procedure has been completed successfully. The purchase order has been supplied and invoiced to the customer.
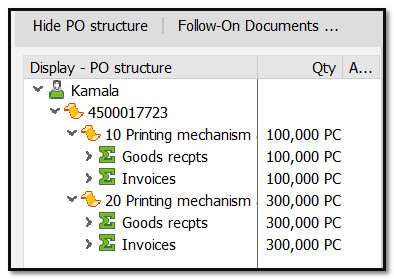
Figure 11 Logistic Invoice - Purchase Order Structure
SAP has implemented methods for invoice verification in the Materials Management module that adhere to specific rules, allowing for some flexibility.
- It is possible to post an invoice without referencing a purchase order, a goods receipt, or a delivery note.
- The option to park an invoice document is available through the transaction code MIR7 or by navigating to:
Logistics > Materials Management > Logistics Invoice Verification > Document Entry > Park Invoice
This functionality allows for the postponement of invoice posting in cases where the invoice balance is not zero.
- The option to post an invoice with a variance within the specified tolerance limits can be configured through the path:
IMG > Materials Management > Logistics Invoice Verification > Invoice Block > Set Tolerance Limits
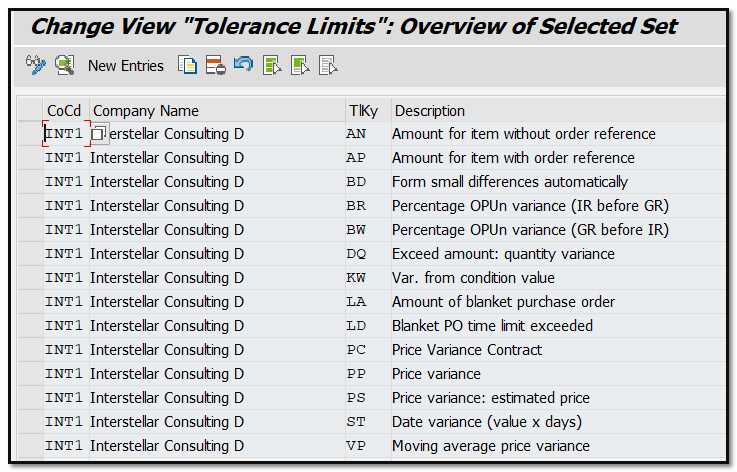
Figure 12 Logistic Invoice Verification - Tolerance Limits
- There is an option to block invoices.
- The option to release blocked invoices is available by deleting irrelevant blocks for the selected invoices, using the transaction code MRBR or the path:
Logistics > Materials Management > Logistics Invoice Verification > Further Processing > Release Blocked Invoices
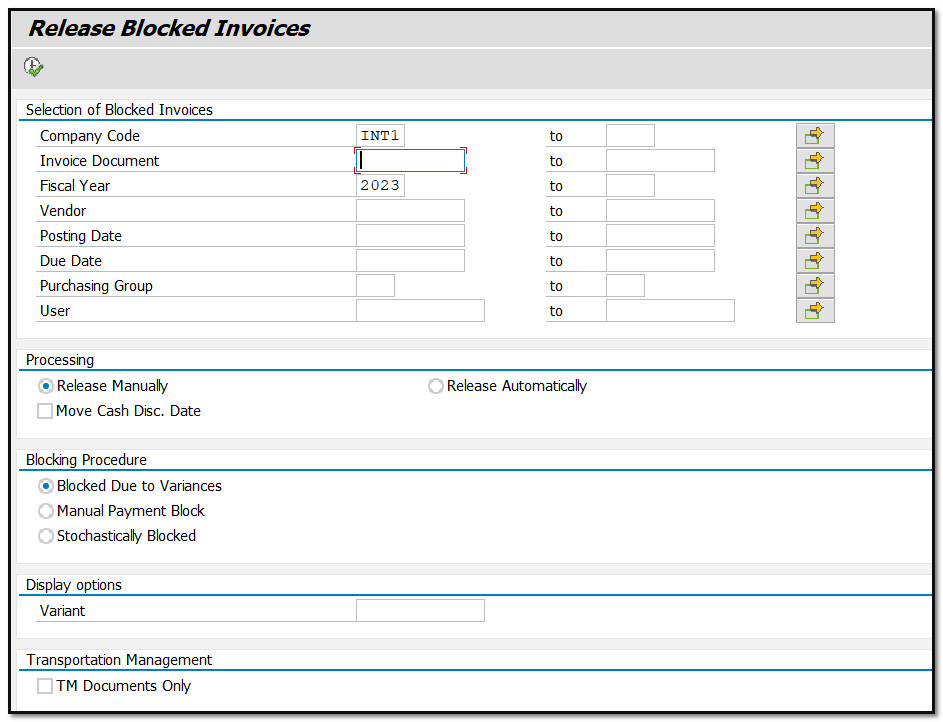
Figure 13 Release Blocked Invoices