Flow Steps for intercompany STO with inbound delivery
- Create Intercompany Purchase Order.
- Create Outbound Delivery for Purchase Order.
- Do Pick, pack and Post Good Issue for Outbound Delivery from supplying plant.
- Output will be automatically triggered.
- Confirmation control of Purchase Order will be updated with inbound Delivery.
- Do Putaway and Post Goods Receipt for Inbound Delivery.
- Create AR Invoice without/ with RD04.
- Create AP Invoice/ AP Invoice created by output RD04.
1. Create Intercompany Purchase Order (ME21N)
Enter the organizational data and supplying plant information, then click Enter. You will now be able to enter the materials, quantity and the plant which is to receive the items.
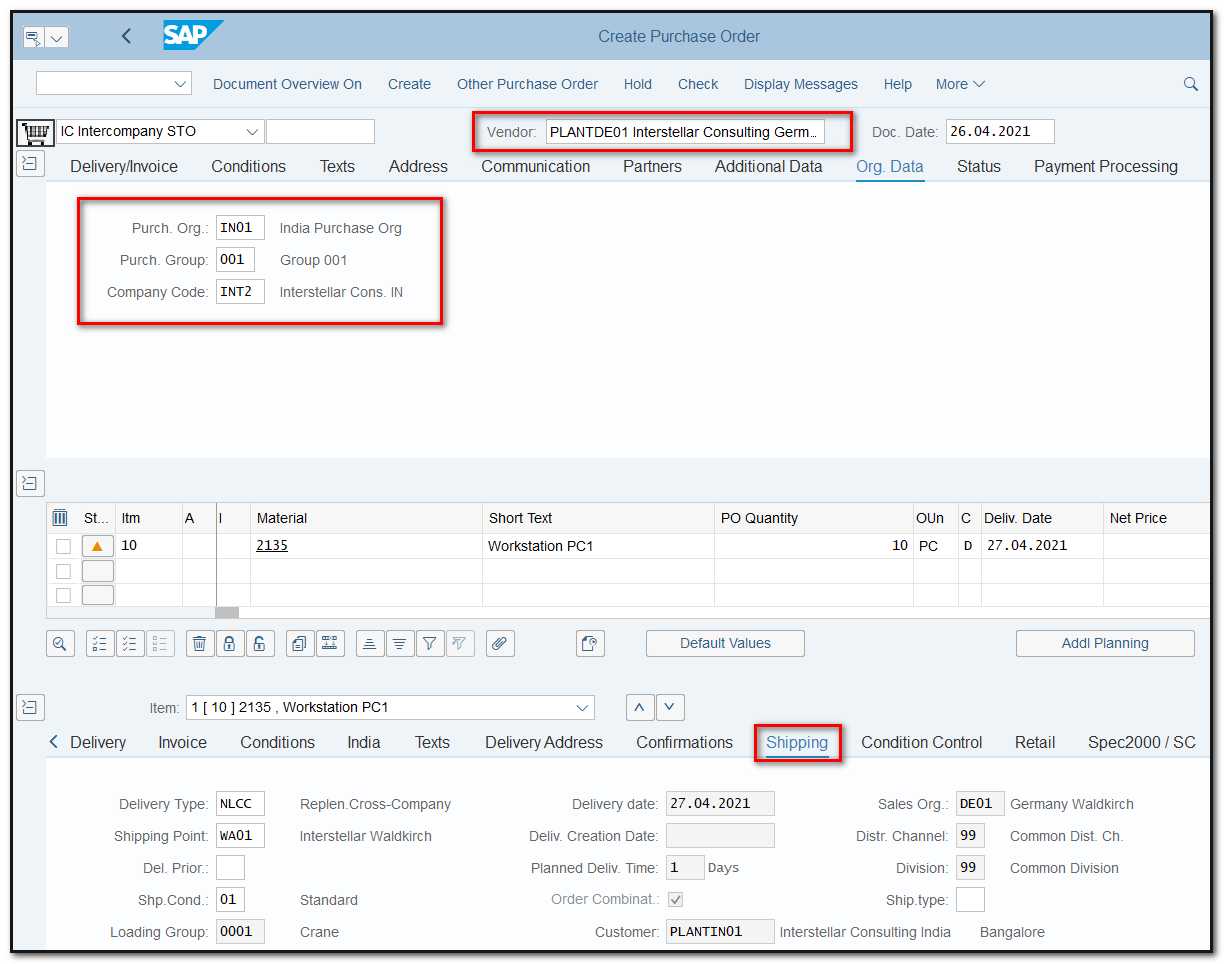
Figure 1 Intercompany Stock Transfer Order creation
PLEASE NOTE: For intercompany POs, the shipping tab must be active and the necessary fields filled in. If you are unable to access the tab, there may be a problem with the customer's assignment to the vendor or the maintenance of the shipping data, which would prevent you from dropping the outbound delivery
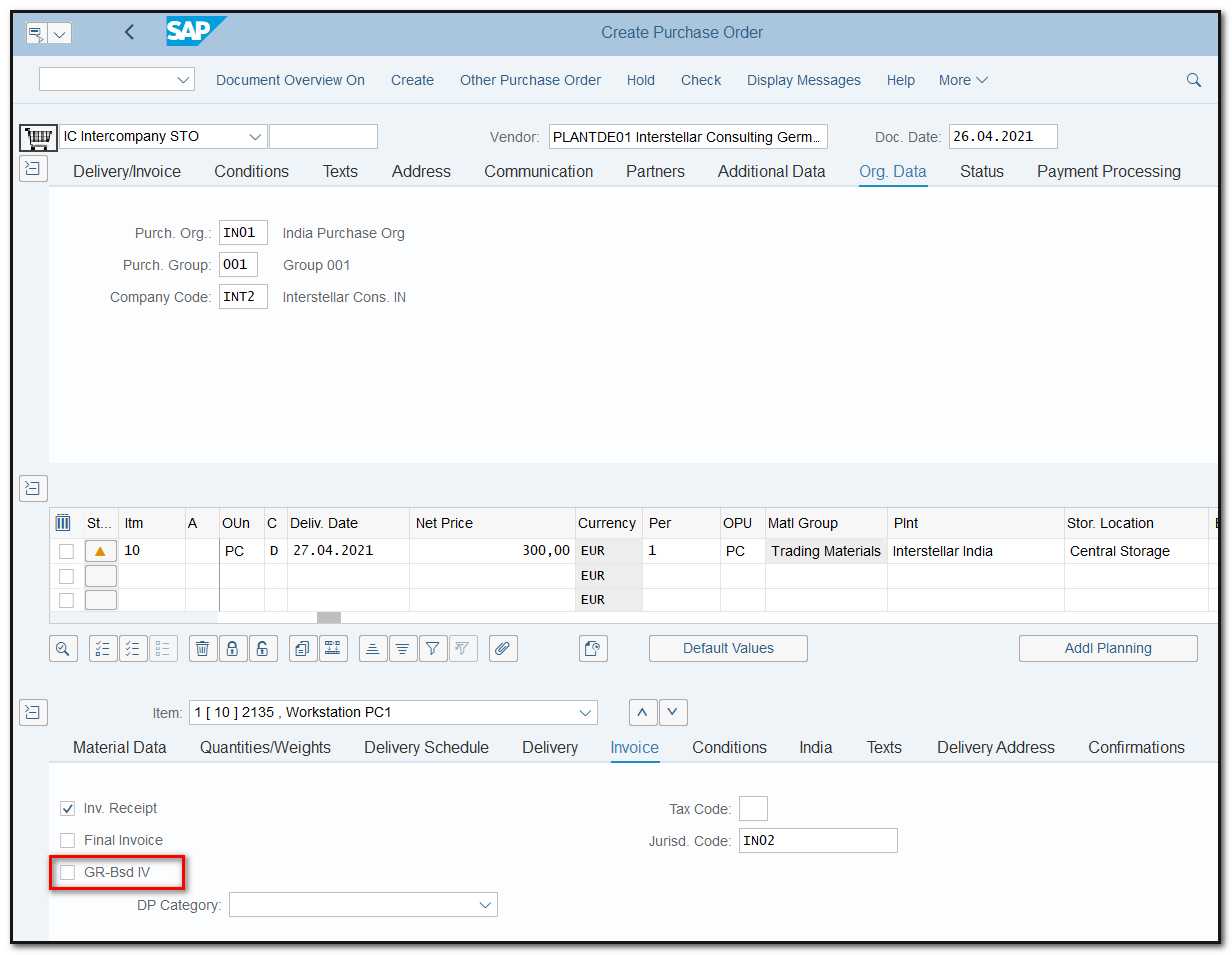
Figure 2 Intercompany Stock Transfer Order creation, invoice tab
PLEASE NOTE: You must deselect GR-Bsd IV in the invoice tab if you want the AP invoice to be generated automatically using output RD04.
2. Create Outbound Delivery (VL10B)
To show the stock movement out of the supplier plant (define as intercompany vendor here), you would need to generate an outbound delivery referencing the purchase order. Click EXECUTE after inputting the purchasing document number or other information.
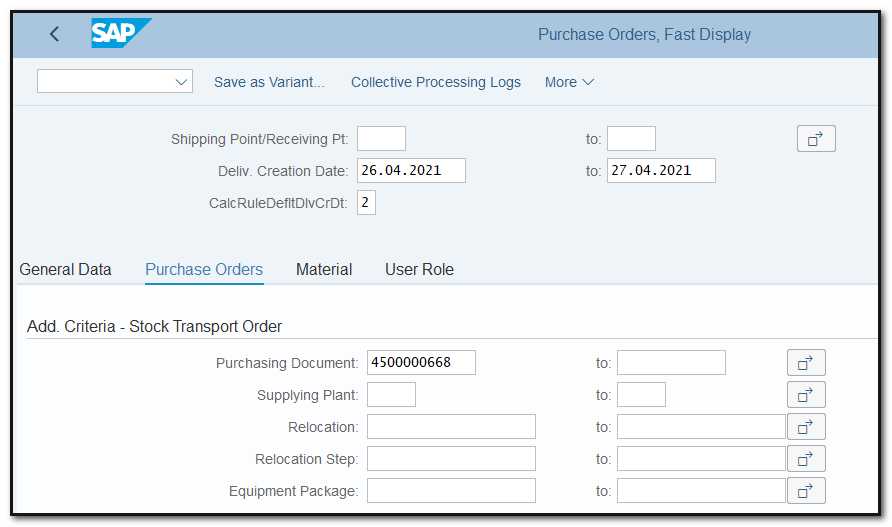
Figure 3 Creation of Delivery for intercompany STO, initial screen
The delivery is created in the background. If you cannot see the delivery number, change the layout or/and select the line and hit in More/ Show/Hide delivery button.

Figure 4 Delivery creation, activities due for shipping
PLEASE NOTE: To create an outbound delivery, the supplying plant must have enough unrestricted stock. You can check this in Transaction MMBE. In the purchase order, show the stock overview or look at the ATP horizon.
3. PGI outbound Delivery (VL02N)
The following action is to complete the post goods issue for the outbound delivery in order to show that the stock has left the supplying plant.
Enter the picking quantity and storage location first, then press Enter.
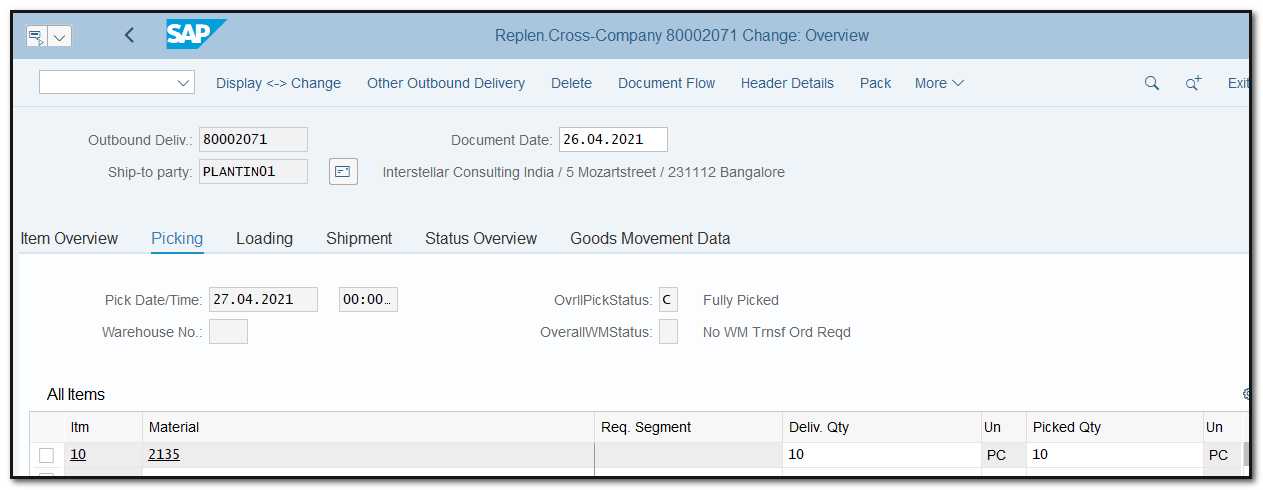
Figure 5 Outbound Delivery – Picking
Check the status of the delivery, and if completed click on Post Goods Issue button.
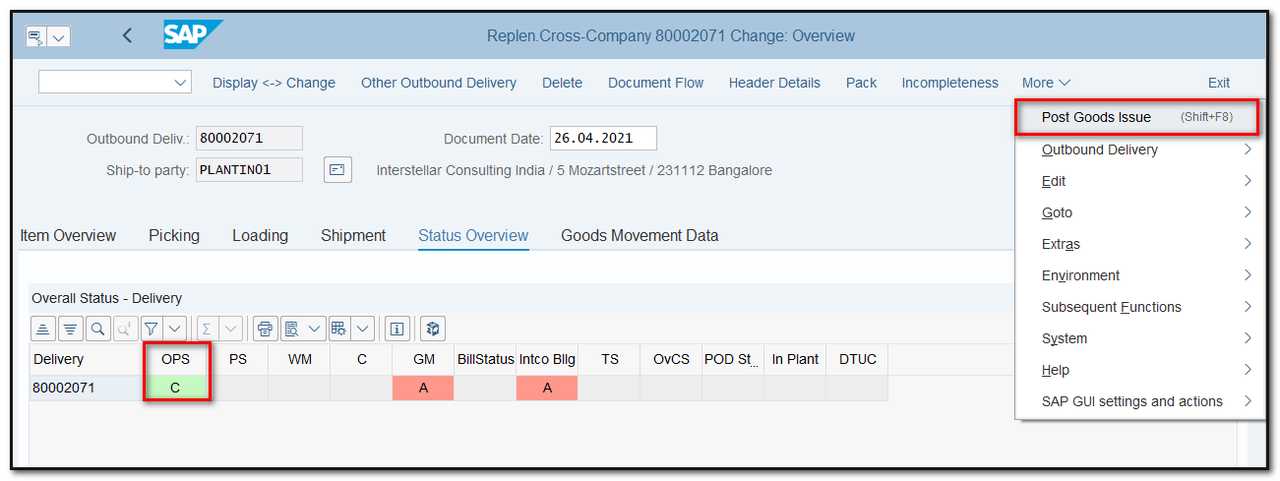
Figure 6 Outbound Delivery – Post Goods Issue
4. Checking Output SPED in delivery (VL03N)
To see if the output is getting triggered correctly, in the delivery go to More | Extras | Delivery Output | Header

Figure 7 Delivery Output Header
5. Confirmation control in Purchase Order (ME23N)
To check the inbound delivery number go to purchase order, you will find it in the confirmations tab.
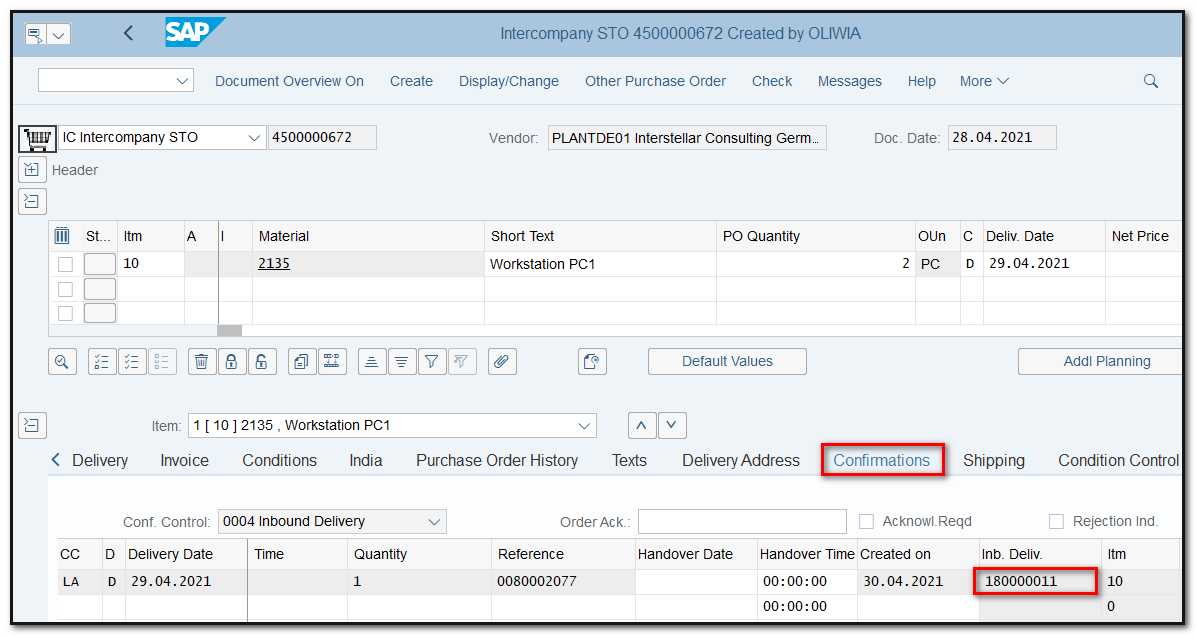
Figure 8 Purchase Order with Inbound Delivery Number
6. Putaway and Post Goods Receipt for Inbound Delivery (VL32N)
Go to transaction VL32N and enter the inbound delivery number. Fill in the putaway quantity in the tab Stock Placement and click enter.
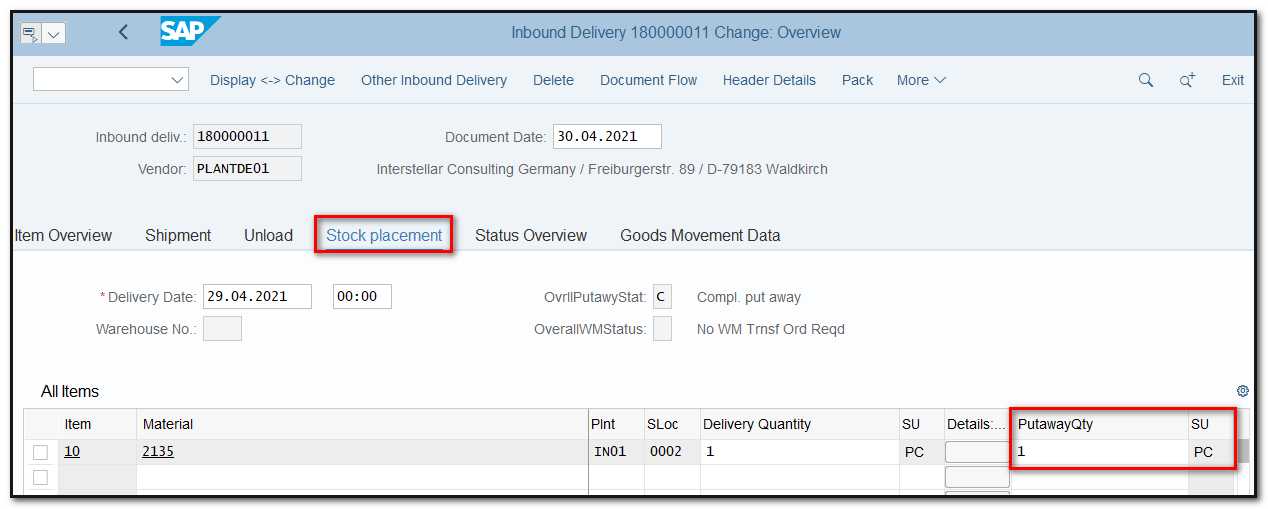
Figure 9 Inbound Delivery, putaway
Next post goods receipts by using menu More | Post Goods Receipts, as shown below:
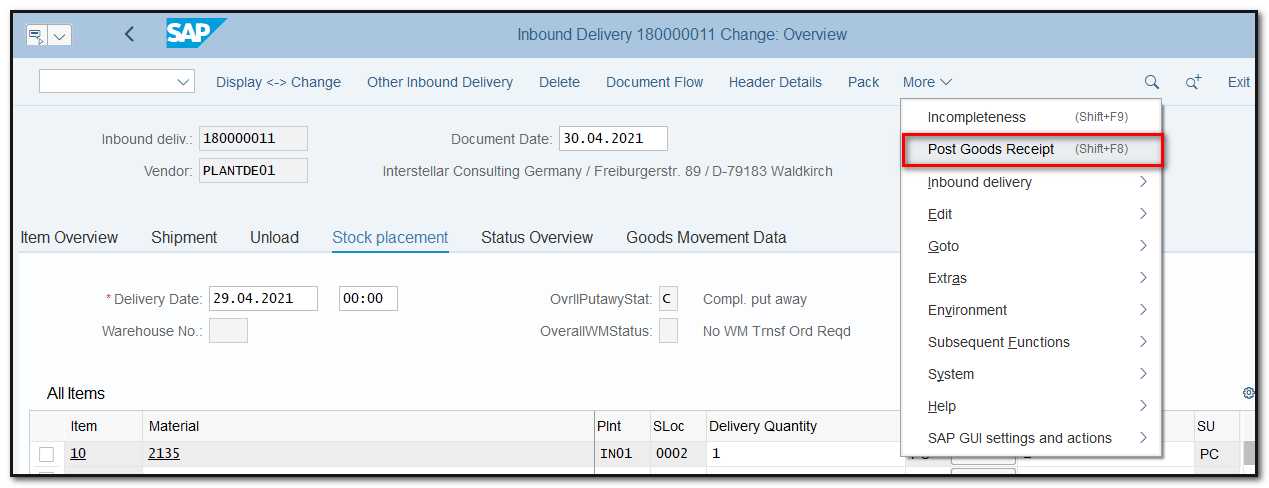
Figure 10 Inbound Delivery, Goods Receipt
The purchase order history will be automatically updated with the goods receipts document number.
7. AR Invoice Creation without/ with RD04 (VF01)
To create an AR invoice go to transaction VF01, enter the delivery number and click on Execute. You will be redirected to the invoice overview, as shown below:

Figure 11 AR Invoice, overview
To see details of the invoice, click on the Details icon.
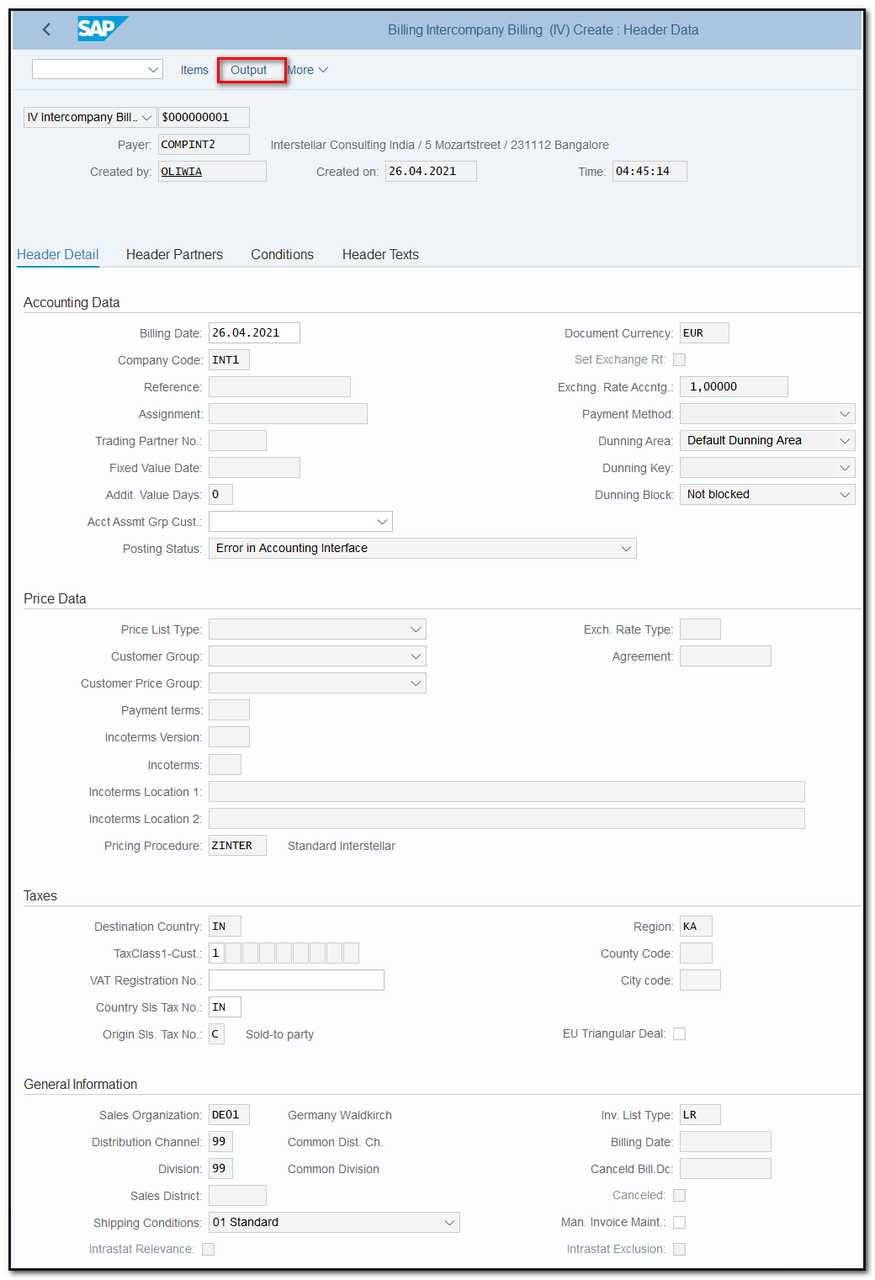
Figure 12 AR Invoice, details
In case, you are using output RD04, check if the output was automatically triggered and then save the invoice.

Figure 13 AR Invoice, output details
The status of output RD04 is not processed. After saving the AR invoice the status should change to successfully processed, as shown below:

Figure 14 AR Invoice, output processed
8. Create AP Invoice / AP Invoice created using output RD04 (MIRO)
You can create AP invoice manually or automatically using output management (RD04).
In the first case, in the transaction MIRO enter the PO number and click enter. Enter the amount and calculate the Tax. Fill in other details and click on Post.
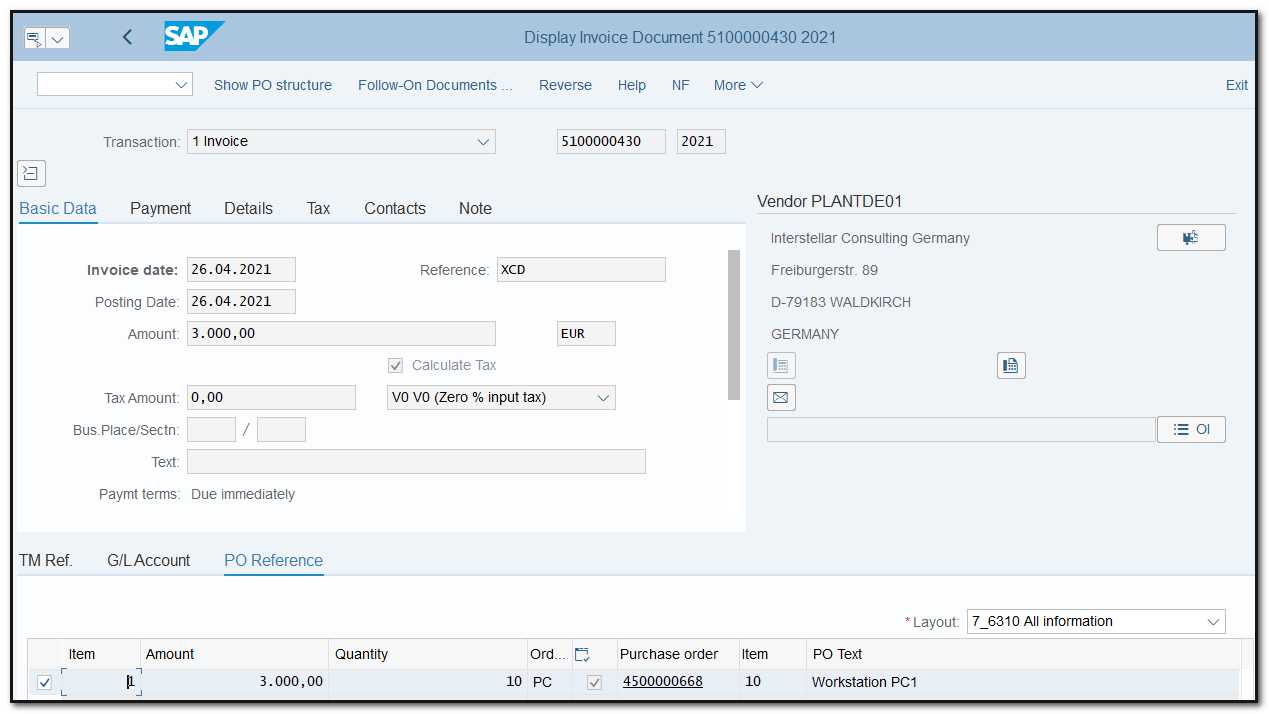
Figure 15 AP Invoice, manual creation.
The final financial posting has been completed. The flow should be changed as indicated below in the tab Purchase order history for the intercompany PO:

Figure 16 Purchase Order History
If output RD04 is being used, saving the AR invoice will automatically trigger the AP invoice.
