In order to schedule a background job on specific day(s) of month, for example every Tuesday and Thursday, and at the end of each month, and this job frequency can not be met with standard SM36 settings, you can achieve the goal by creating a factory calendar and then use it for job scheduling in SAP.
Steps:
- Create Factory Calendar
- Create Background Job using Factory Calendar
- Create Factory Calendar
In SAP system enter transaction code SCAL and click on “Execute”. On the next screen under Subobjects, select "Factory Calendar" and click on “Change” button.
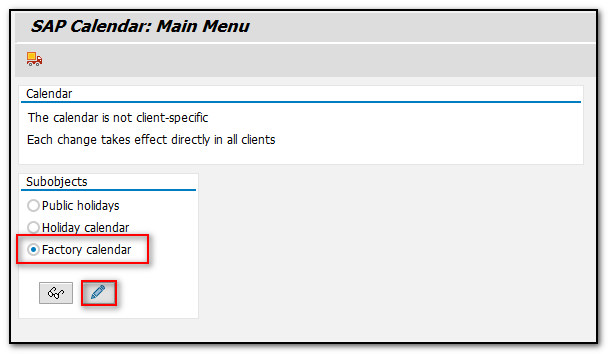
Figure 1 SAP Calendar – Main Screen
If there is no calendar which met your requirements, click on "Create" button.
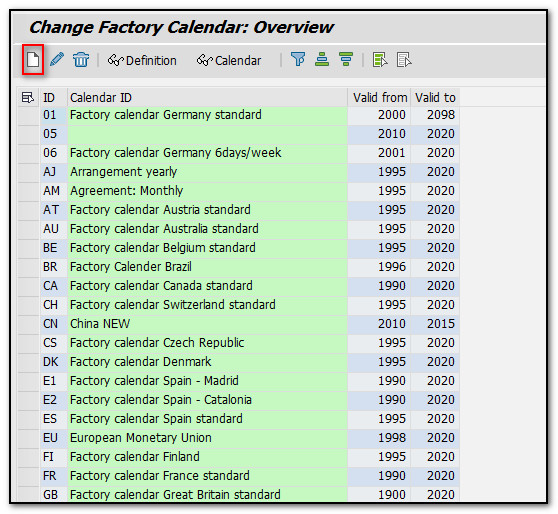
Figure 2 SAP Factory Calendar – Main Screen
Enter Factory calendar ID name and description. Specify the "From Year" and "To Year" information and press “Save” button.
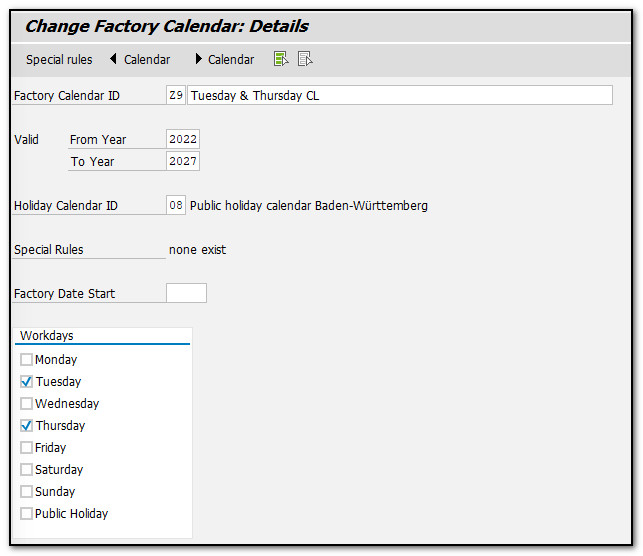
Figure 3 SAP Factory Calendar – Details
The factory calendar will prompt you with information on transportation; read it, then acknowledge it by pressing enter or clicking on “Continue” button.
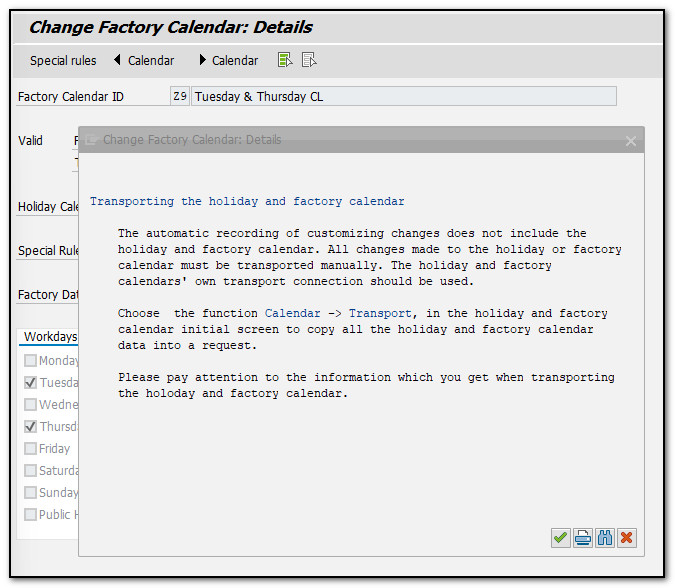
Figure 4 SAP Factory Calendar - information on transportation
Now we can also specify additional dates for which we want the calendar to be active. Press “Special Rules” button to add more dates for the calendar.
In our case, we will create one special rule for every last day of the month. The checkbox for the Workday on these dates should be always selected.
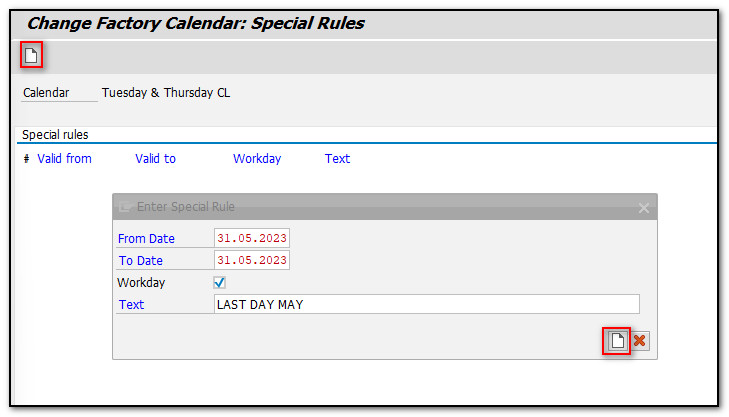
Figure 5 SAP Factory Calendar – Special Rules
Press “Save” after you have established all of the unique rules for each of the last days of the month between your calendar's "From Date" and "To Date." The years in our example are from 2022 to 2027.
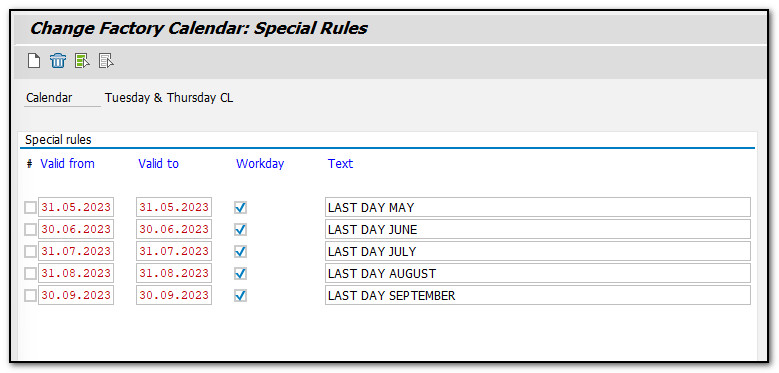
Figure 6 SAP Factory Calendar – Special Rules defined
- Create Background Job using Factory Calendar
We will now define our job and link this calendar. SM36 transaction should be run to create the job. Name the program according to the requirements. Then click on “Start Condition".
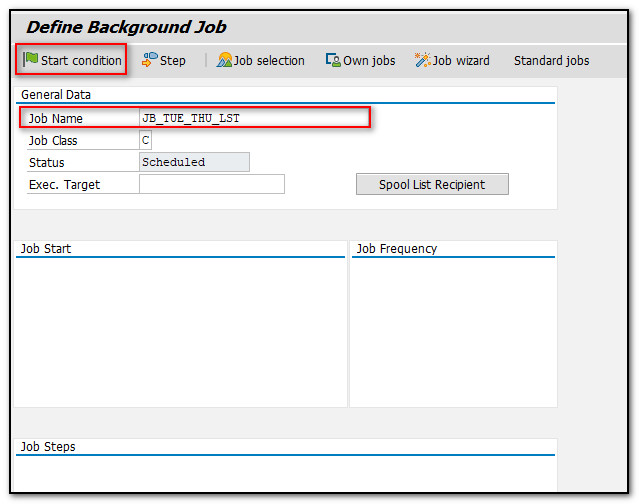
Figure 7 Defining Background Job
Under Date/Time enter the scheduled start date and time, then click on “Period Values”. On the pop up select "Daily" for the job frequency, check and save it.
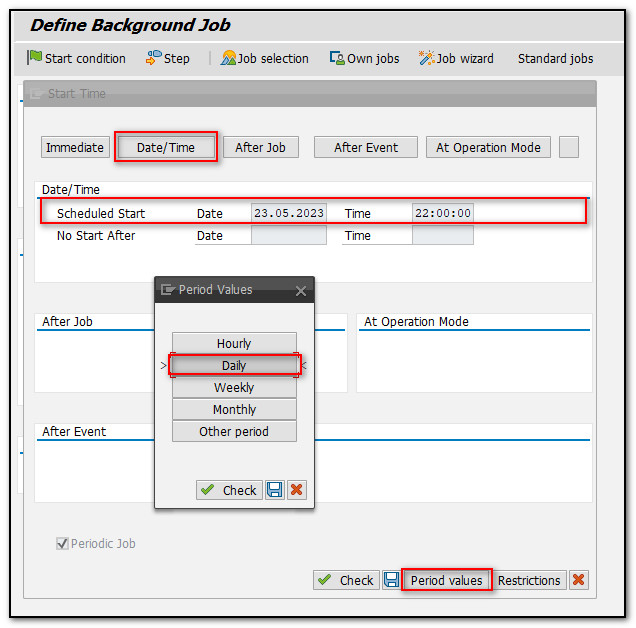
Figure 8 Defining Background Job – Start Conditions
Next press "Restrictions" button and enter the newly created calendar and select “Move job to next workday”, as below.
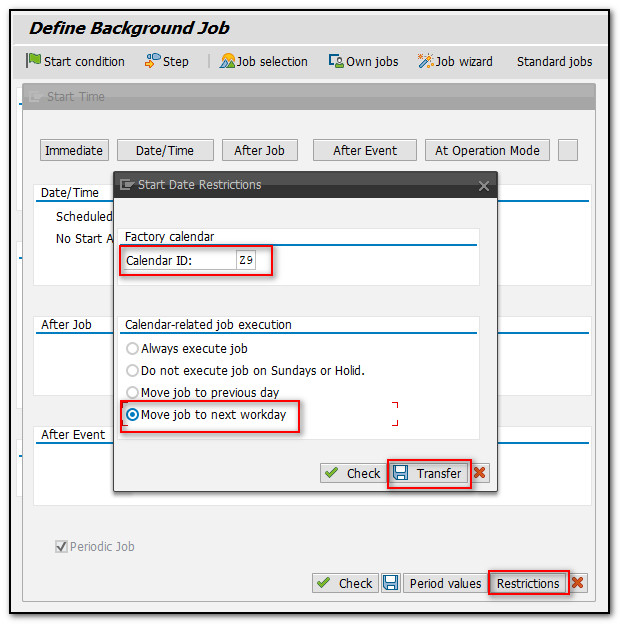
Figure 9 Defining Background Job - Restrictions
Press" Transfer" button, and save the settings.
Once you are back on the main job creation screen, click on “Step” button. Enter the program name and variant if required.
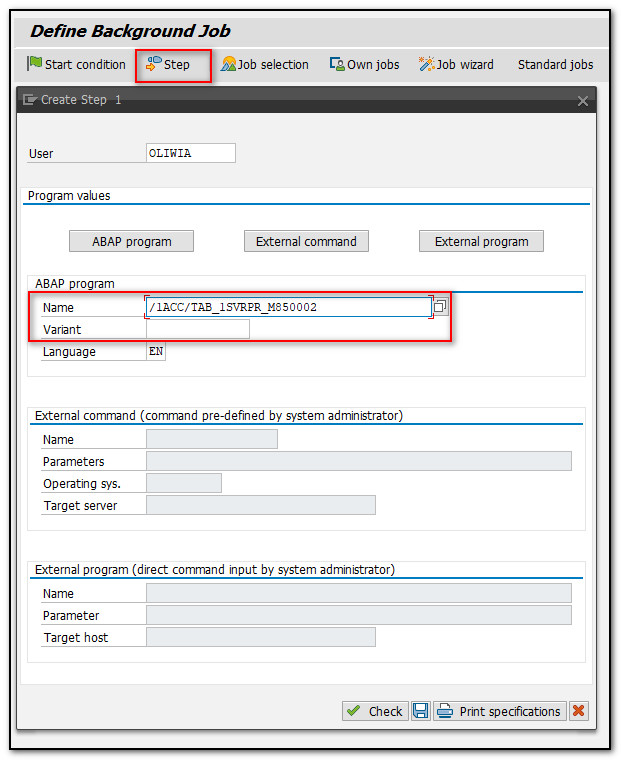
Figure 10 Defining Background Job – Adding Steps
Click on “Check” button and if no error message popup save the step. You will be redirected to the step list overview, as shown below:

Figure 11 Defining Background Job – Steps Overview
Go back, and save the job. The background job was saved with the released status.


Rohit Sharma 3 yrs
Great, this helped me with one of the clients recently.. Very well done documentation thanks @Oliwia