There are some times when you need to edit an SAP table and there is no edit view mode nor sap_all authorization. However, if you have both debugging and debugging edition authorization, there is a trick to achieve this. To go through the debugging mode, you can use the F5, F6, F7, and F8 keys.
The F5 key is for single step execution, which lets you go through the program line by line and jump between program units.
Using the 'execute' (F6) option allows you to process each program statement one by one, which can make it easier to understand and run an entire program.
The "Return" command (F7) causes the Debugger to return control back to the main program. Utilize this option if you need to get out of another program module.
Pressing F8 will cause the program to run until the next breakpoint. If there are no more breakpoints, debugging mode will be terminated and the rest of the program will execute as normal.
You can inspect all variable values and the contents of internal tables.
In debugging mode, Watch-point enables you to watch a variable. When its value changes or reaches a predetermined value, the execution pauses.
Debugging using transaction SE16N
- As per usual, navigate to SE16N and enter the table you want to modify.
- To enable debugging, enter /H in the command field and then press “Enter”.
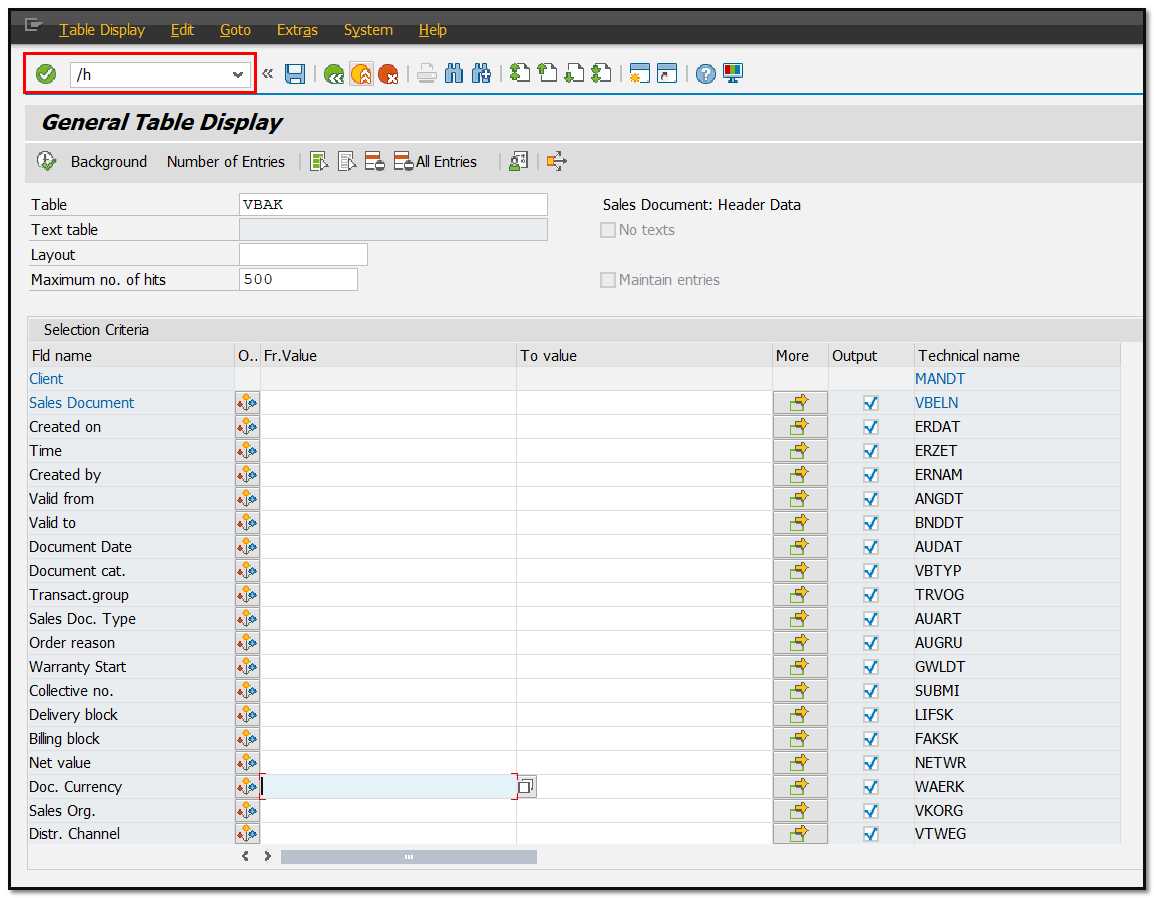
Figure 1 SE16N: Table selection
- To access the data browser for the above table, press F8.
- Once you are in Screen 100 during debugging mode, type in GD-EDIT and GD-SAPEDIT, then press the “Enter” key.

Figure 2 SE16N: Add new variables
- Click the change button for each variable and change the value to an uppercase “X”, then press the Enter key.
- To exit debugging and access the table in change mode, press F8. Now the entries can be edited or a new entry can be added.

Figure 3 SE16N: Table in edit mode
Debugging using transaction SE16
- To begin, launch transaction SE16 and choose the desired SAP table. Press F8 and execute the transaction to view the individual table entries.
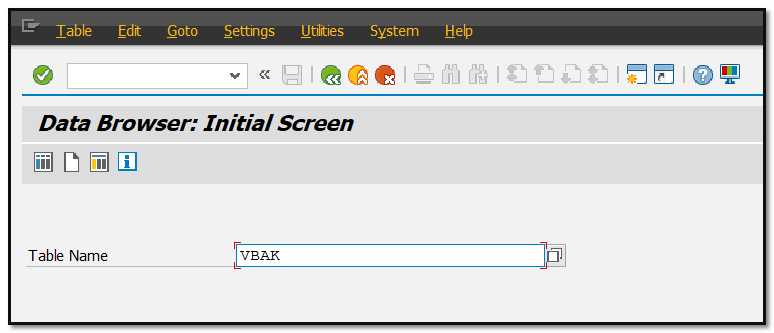
Figure 4 SE16: Initial Screen
- To open the detailed view of an existing SAP table entry, double-click on it.

Figure 5 SE16: List view
- To start the debug mode, type "/h" in the command field. To start a debug session, click the command field one more time and hit Enter.
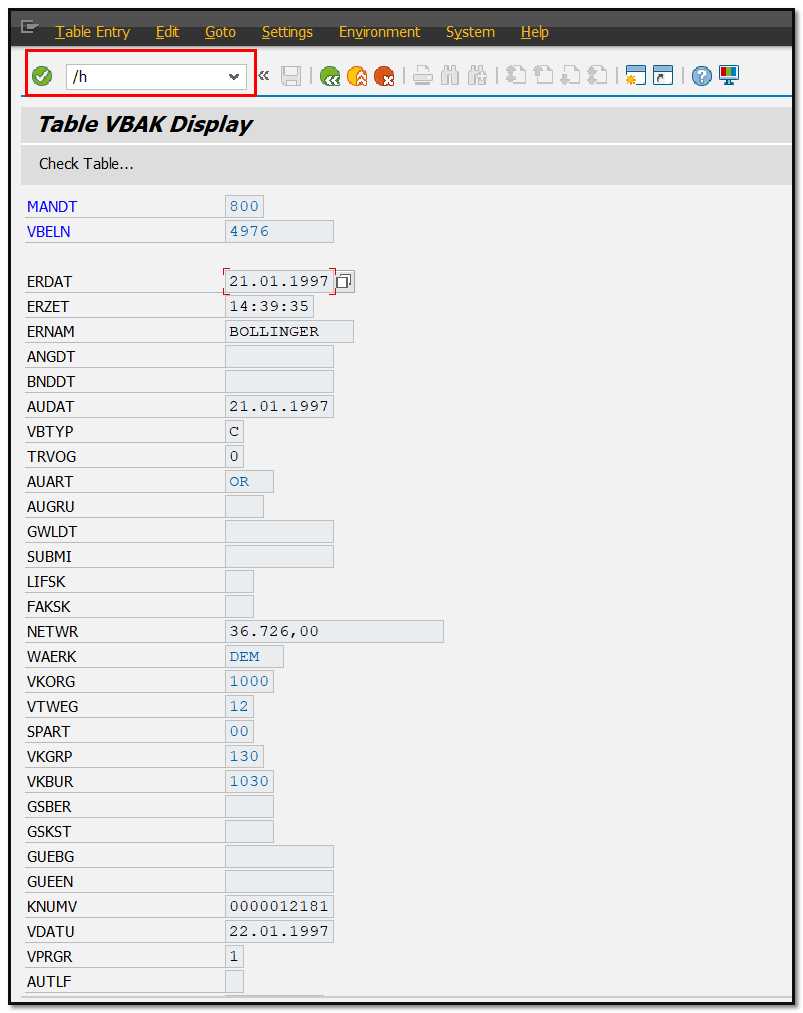
Figure 6 SE16: Detailed view of an entry
- The transaction will then open the ABAP code. In the ABAP code, double-click the "code" variable. Switch the value of the variable in the right-hand window to either "EDIT" or "INSR", and press Enter to confirm.
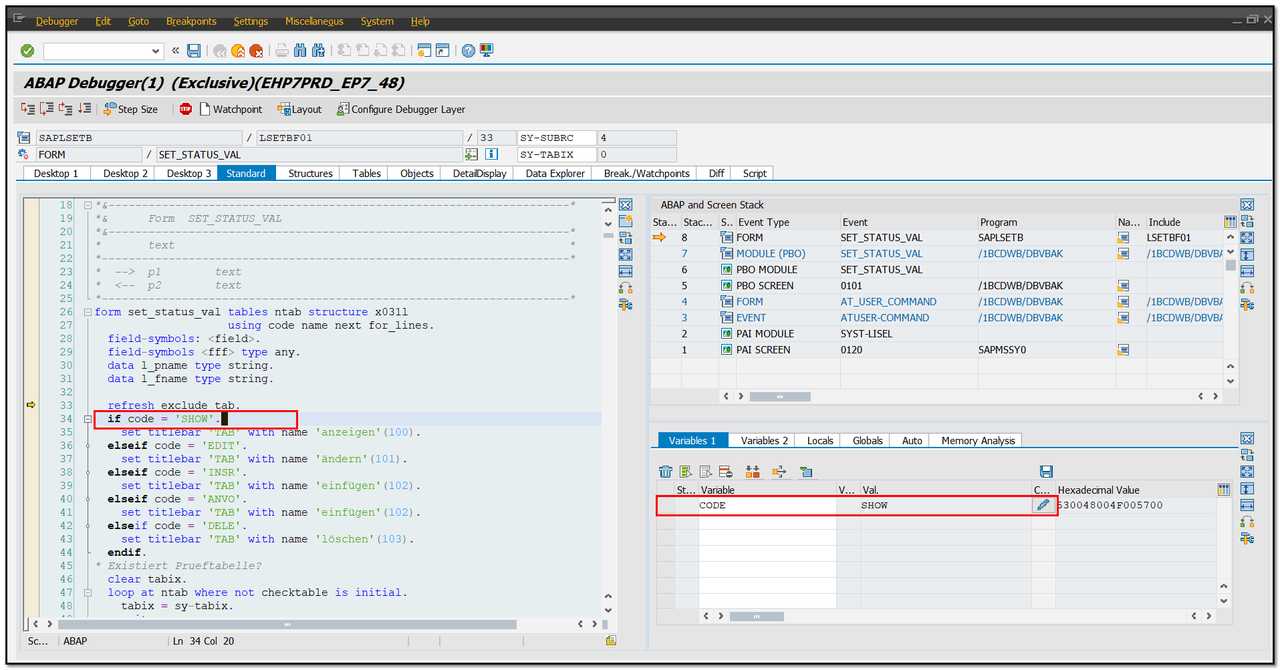
Figure 7 SE16: Debug mode to change a variable “Code”

Figure 8 SE16: Variable “Code” - EDIT
- When finished, press F8 to complete the code. You can either edit the existing entry or add a new one.

Figure 9 SE16: Tables in edit mode