This article is a continuation of the SAP Master Data Migration using LSMW – Procedure Part 2, where we completed autofield mapping and conversion rules. Now, we will move on to the next steps of LSMW, which involve specifying the files, reading and converting the data.
Maintain Fixed Values, Translations, User-Defined Routines
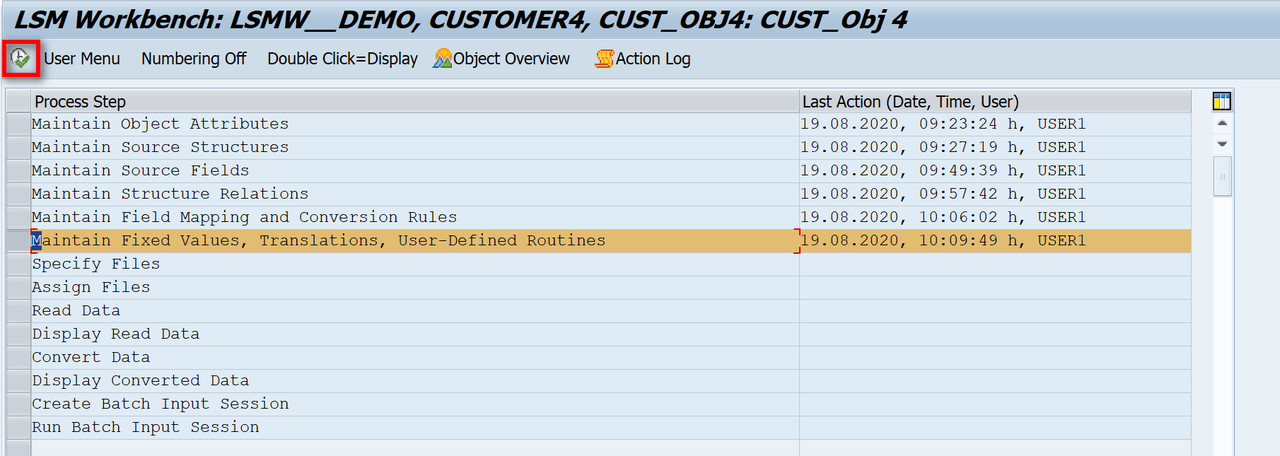
Figure 1 LSMW – Maintain Fixed Values, Translations, User-Defined Routines
- In the Maintain Fixed Values, Translations, User-Defined Routines step, project rules can be processed, which are set at the project level and remain consistent across all objects.

Figure 2 LSMW – Fixed Values, Translations, User-Defined Routines Creation
- Fixed value: The field name, value, type flag for lowercase/uppercase, and length can be specified here.
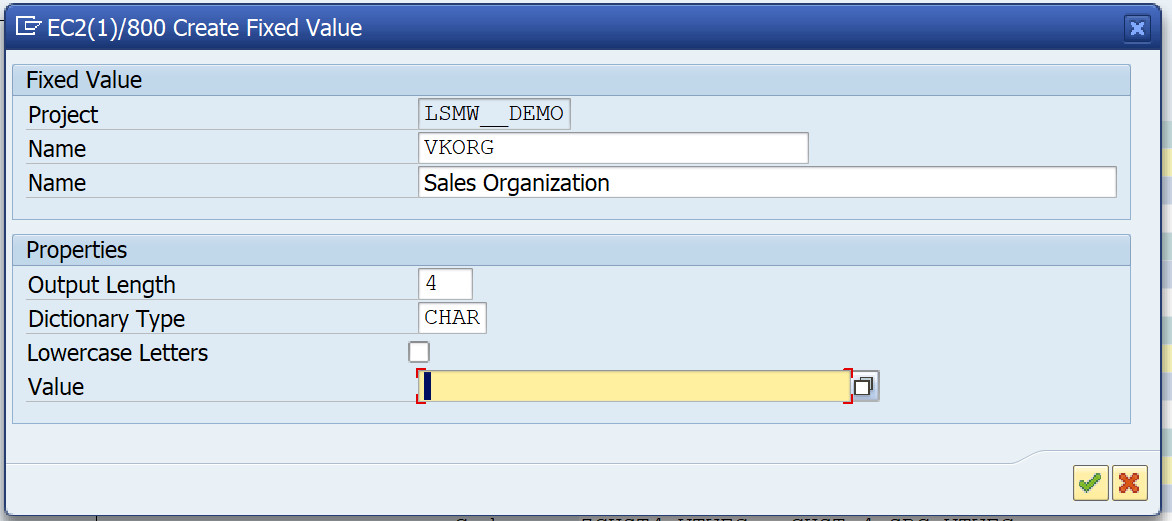
Figure 3 LSMW – Fixed Value
- Translation: Here You can enter information in the source and target fields here. Before making any modifications, save the data if you are constructing a new translation.
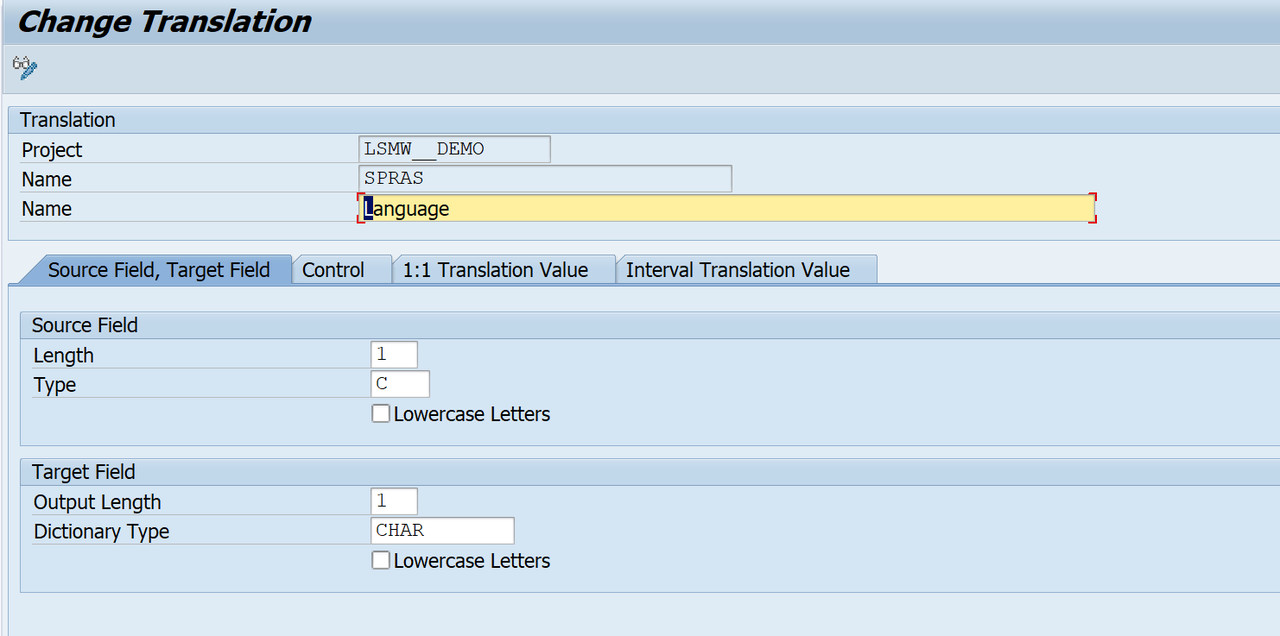
Figure 4 LSMW –Translation
- User Defined Routines: This routine can be applied to other objects of the project. The system automatically prepends 'ur_' to the name you provide for this routine. It provides access to an editor which you can use to input ABAP code.
Specify Files
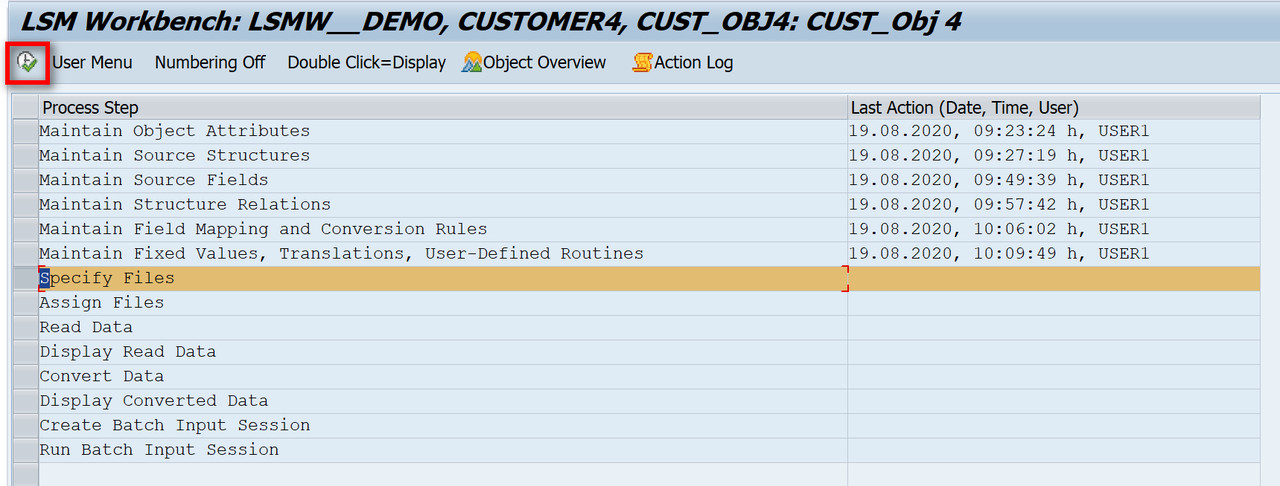
Figure 5 LSMW - Specify Files
The step 'Specify Files' requires you to describe the files to be used.
- To access your legacy data on the R/3 server, place your cursor on the line "Legacy data On the R/3 server (application server)" while in change mode. Selecting the "Add entry" option will display a popup. Provide the file path, name and description, along with any other relevant properties.
- To use legacy data from the PC, the file needs to be prepared as indicated.

Figure 6 LSMW - Specify Files - Legacy Data From The PC
- The file should be saved in a ".txt" format.
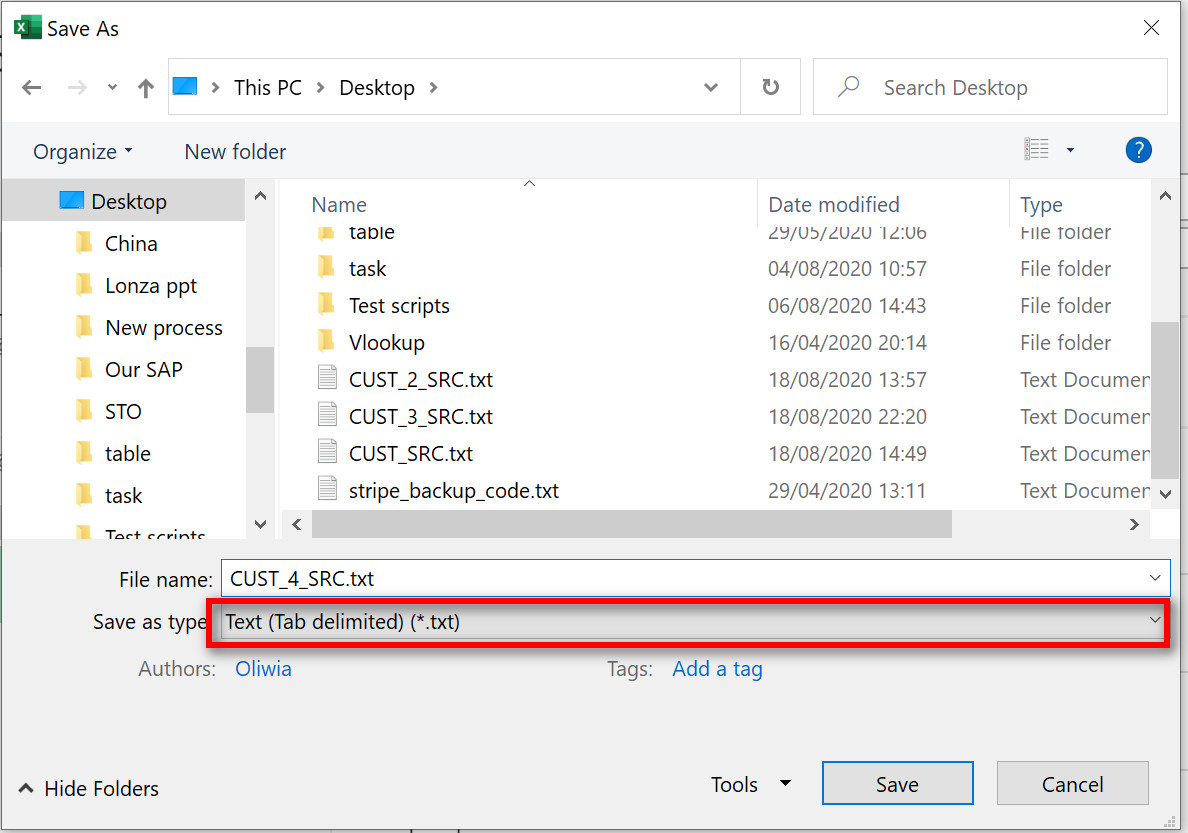
Figure 7 LSMW - Specify Files - Legacy Data From The PC, Format
- Place the cursor on the line “Legacy data On the PC (Front-end)” when in change mode. Select "Add Entry" button.
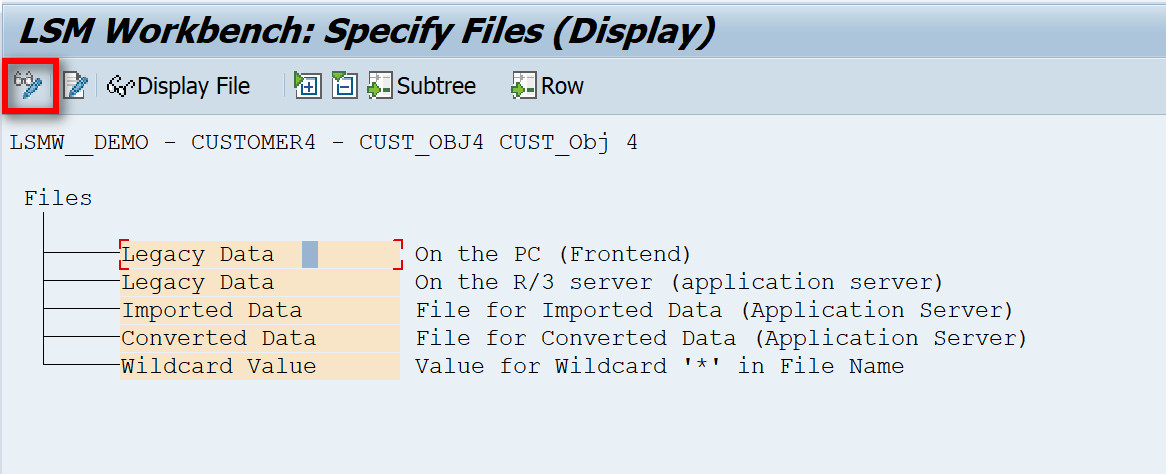
Figure 8 LSMW - Specify Files - Maintenance
- A popup appears. Specify the file path, name and description, as well as other properties.
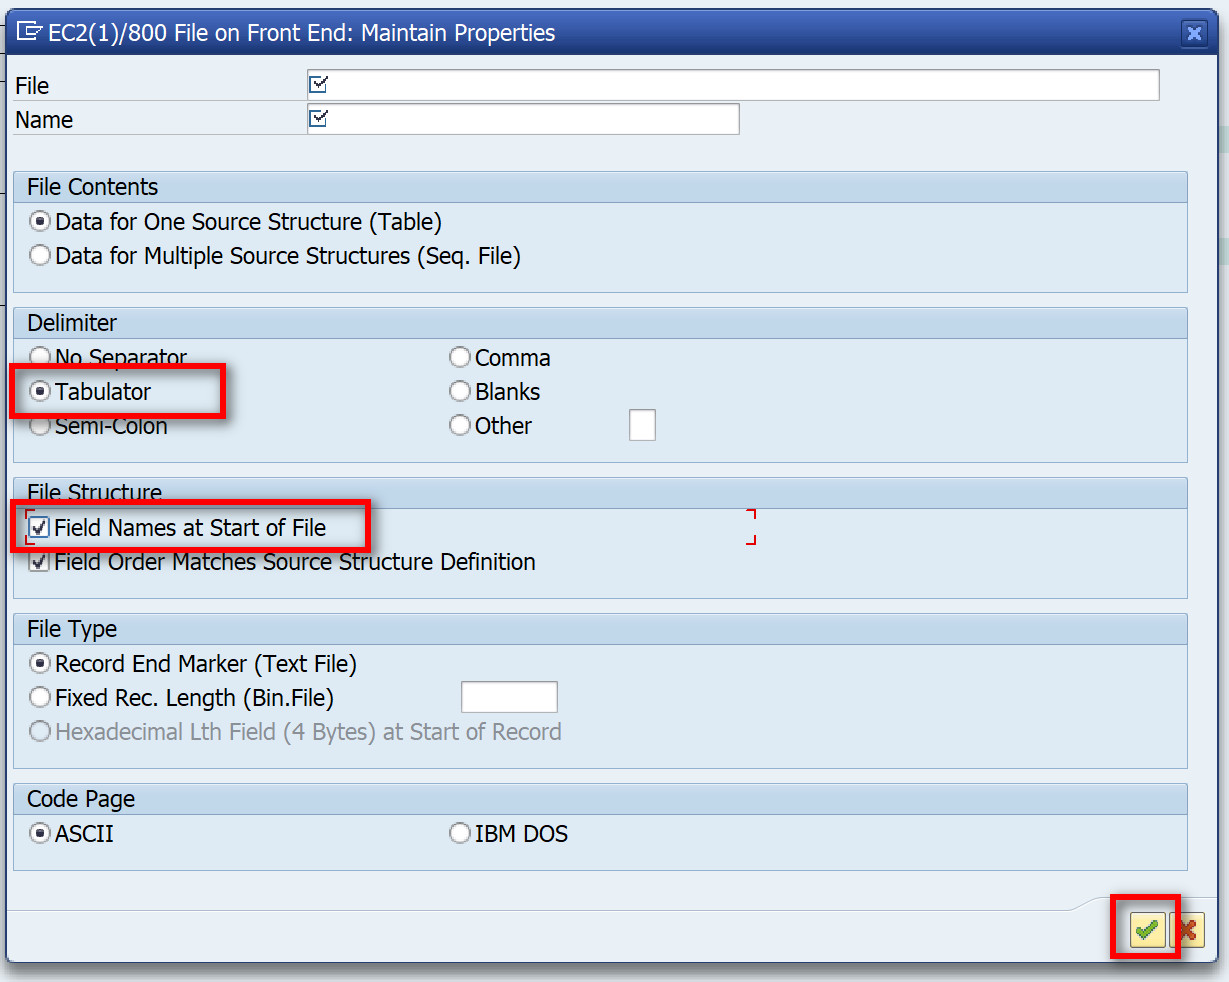
Figure 9 LSMW - Specify Files – Maintenance Properties
- File for Imported data: The file name is entered with the ".lsmw.read" extension.
- File for Converted data: The file name should be entered along with the file extension “.lsmw.conv”. If any conversion rules are applied, this file will contain all the converted data.
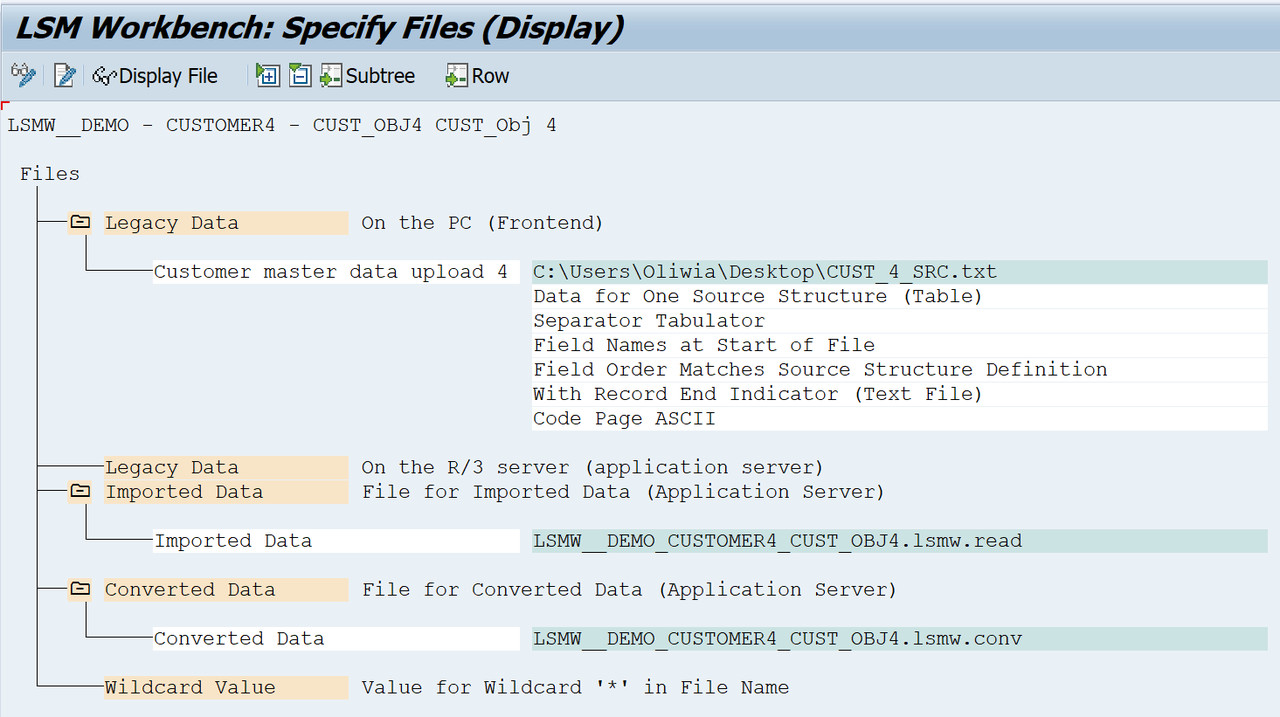
Figure 10 LSMW - Specify Files – Data Imported and Converted
Assign Files
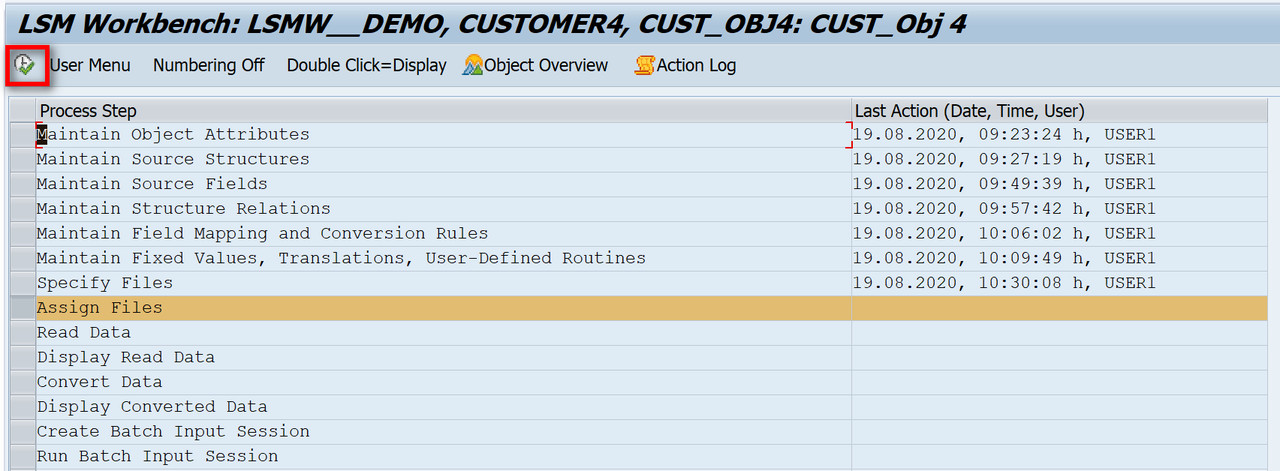
Figure 11 LSMW - Assign Files
You can assign the file name that was designated as the source file in step 7 to the target structure that was established in step 2 by using the “Assign Files” step.
After clicking once on a target structure (in yellow), LSMW displays the list of available source files if you select the “Assign File” button.
When you select a target structure (shown in yellow) and then click the “Delete Assignment” button, the source file is removed from the selected structure.

Figure 12 LSMW – Files Assignment
Read Data
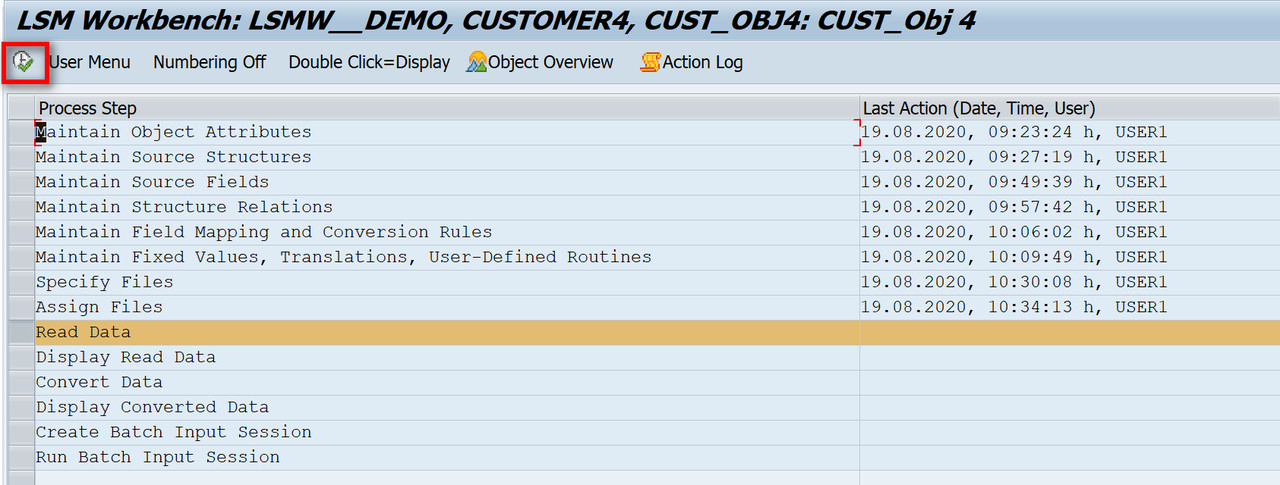
Figure 13 LSMW – Read Data
In this step the file that was specified in the step before is read in, together with any linked target structures.

Figure 14 LSMW – Read Data Selection
Even though you can choose a range of transaction numbers, the entire file is read; the only thing that is affected is the number of transactions actually written.
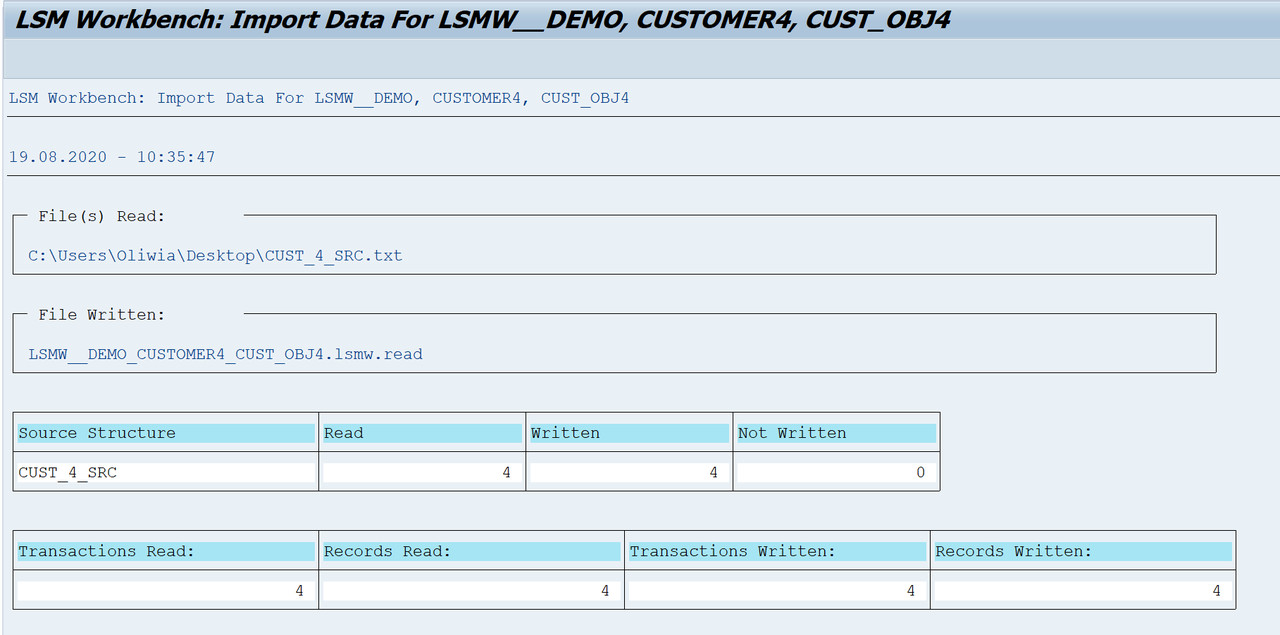
Figure 15 LSMW – Read Data Completed
Display Read Data
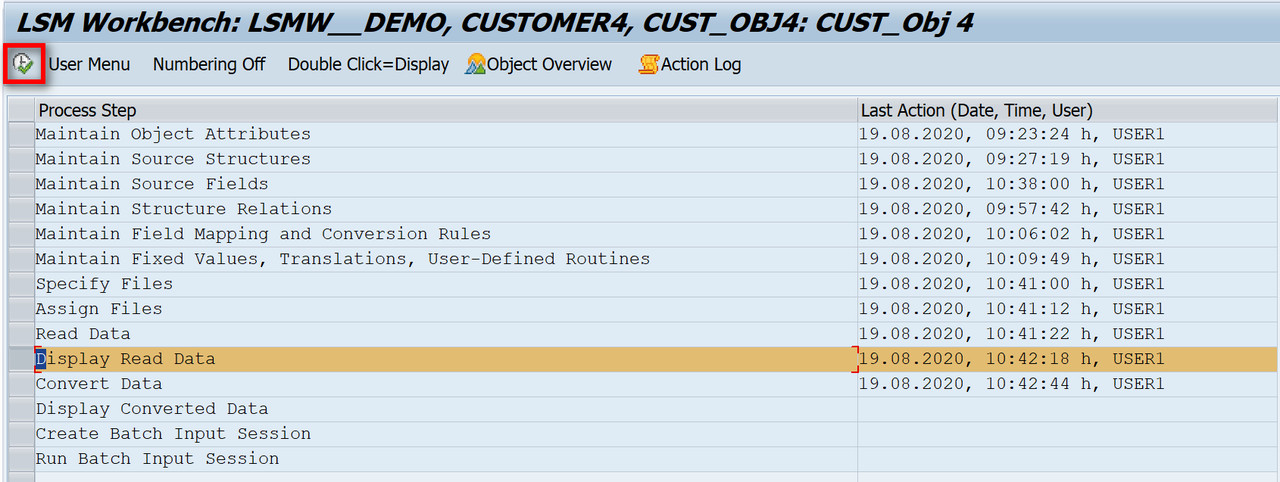
Figure 16 LSMW – Display Read Data
You can choose to show all read data or only a selected interval in the step labelled "Display Read Data," as shown below.

Figure 17 LSMW – Display Read Data Selection
The data are displayed as the source structures. When more than one source structure is utilized in a transaction, the hierarchy of the transaction is indicated by using a separate colour legend.

Figure 18 LSMW – Read Data Displayed
You can inspect the read data as shown below by clicking on one of the lines to get to the line's field level.
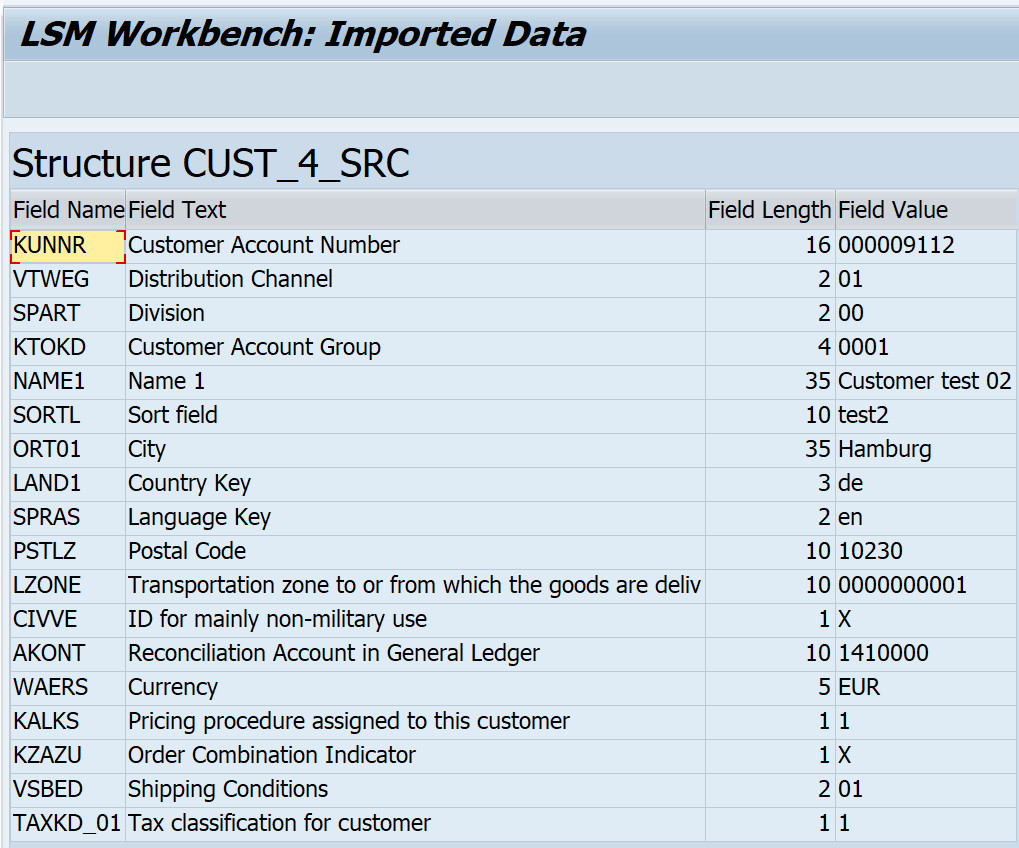
Figure 19 LSMW – Read Data Details
Convert Data
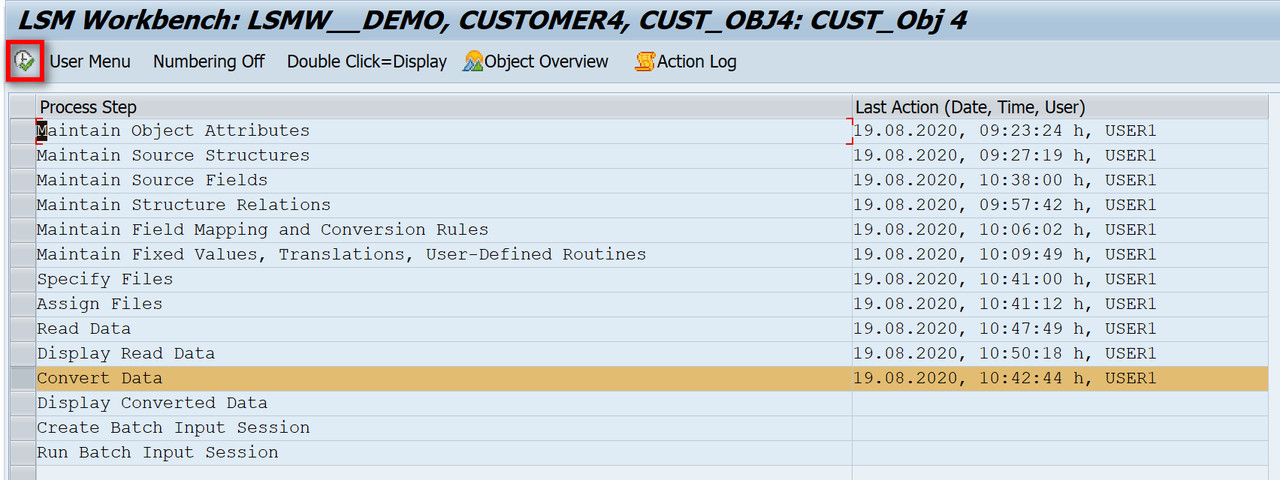
Figure 20 LSMW – Convert Data
The Data Conversion step instead of using the read program, use the conversion program. You can specify a range of transactions that will be converted; after this range has been reached, the conversion program will terminate.

Figure 21 LSMW – Convert Data Selection
Note: It is advised that you load the first 10 records when you load a large volume of data into production so that you may check them and make any necessary changes.
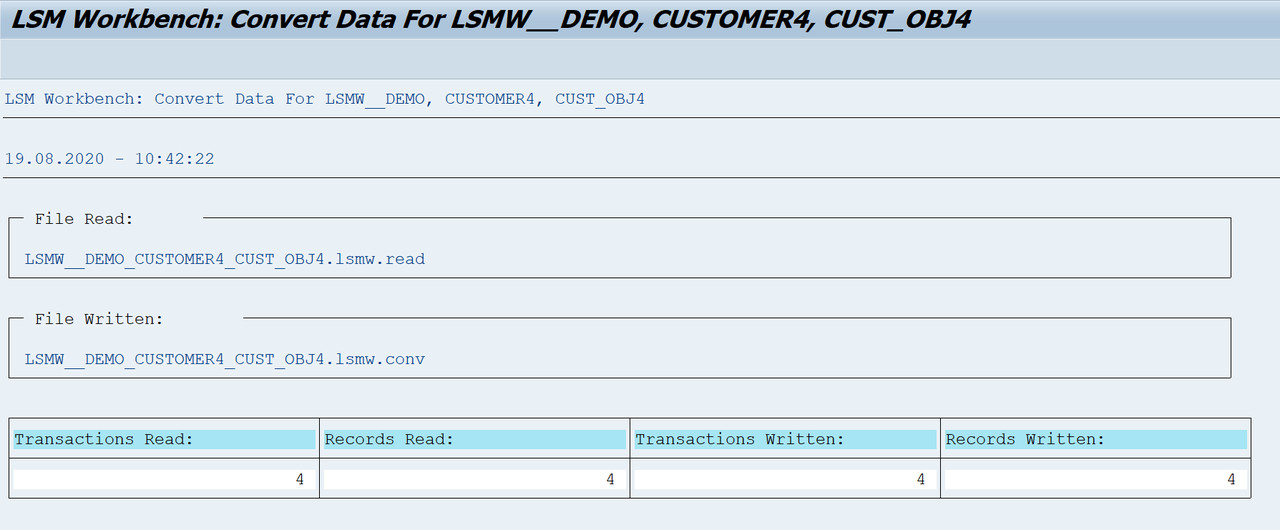
Figure 22 LSMW – Convert Data Completed
Display Converted Data
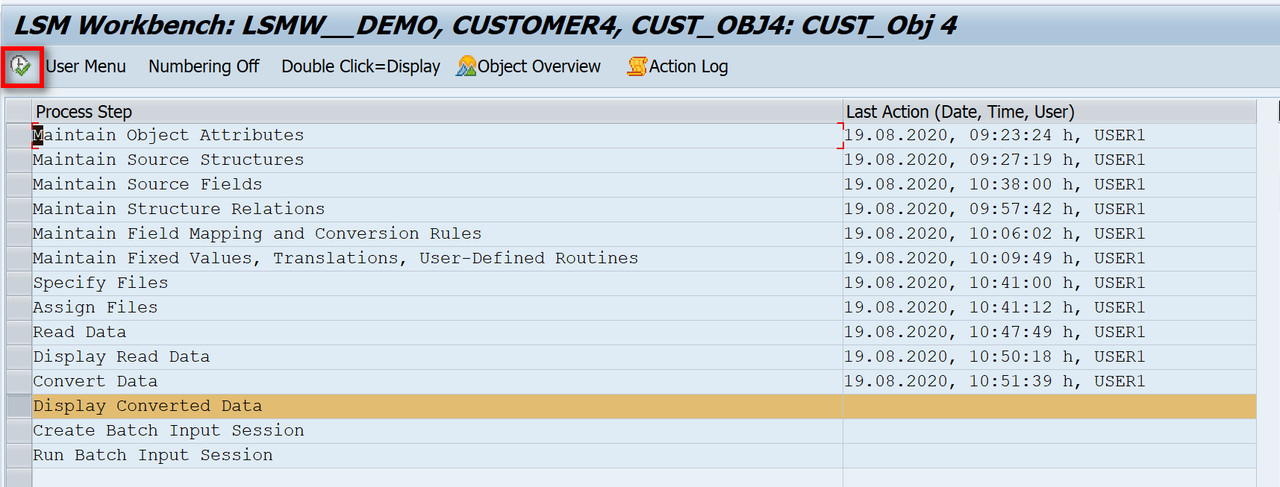
Figure 23 LSMW – Display Converted Data
You have the option to show all converted data or just a selected interval in the step labelled "Display Converted Data".

Figure 24 LSMW – Display Converted Data Selection
The data are displayed as the target structures. When more than one target structure is used in a transaction, the hierarchy of the transaction is indicated by using a separate colour legend.

Figure 25 LSMW – Converted Data Displayed
You can inspect the converted data as shown below by clicking on one of the lines to take you to the line's field level.
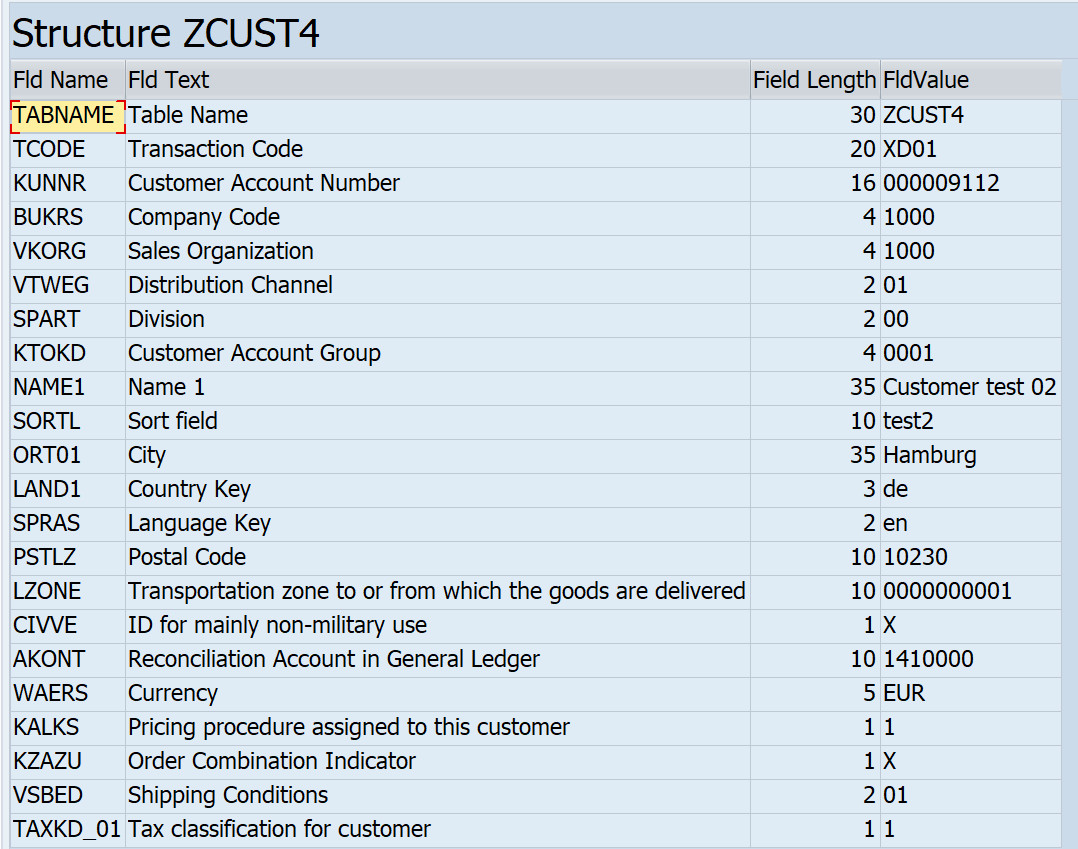
Figure 26 LSMW – Converted Data Details
- Go back and choose the next step. The following step will be discussed in the upcoming article.
