LSMW Introduction
LSMW is a tool based on SAP software which facilitates single or periodic data transfer from non-SAP to SAP systems (or vice versa, with certain restrictions). As an integrated part of SAP, this tool is available to SAP's customers and partners at no cost. This tool is configurable and can be applied to standard SAP applications. Compared to other data transfer methods, its quality, user-friendliness and data consistency make it a preferred option.
The SAP Legacy System Migration Workbench consists of several core functions.
- Legacy data can be imported from PC spreadsheet tables or sequential files.
- Data needs to be converted from the original format to the target format.
- Data can be imported using the standard interfaces provided by SAP.
What data can be migrated using the SAP Legacy System Migration Workbench?
LSMW has the capability to transfer a variety of master data and transaction data within the standard system. This comprises G/L accounts, supplier master data, customer master data, material master data and bills of materials. It is possible to electronically transmit documents including orders, purchase orders, or accounting documents. Additional data objects can be transferred by capturing transactions if the batch input process is suitable. This method can also be utilized to delete a large amount of data.
It is not necessary to migrate individual tables and fields. LSMW uses the approach of bulk data transfer, including complete business objects such as customer master records, from a legacy system to SAP.
Features of LSMW:
- R/3 integration enables platform independence.
- Standard import techniques ensure data consistency.
- A structured approach to work, which involves completing each stage before proceeding onto the next.
- Adhering to the structure is simple.
- No prior development experience is required.
Import techniques in LSMW
SAP LSMW offers additional capabilities for generating and modifying master data, transaction data, and Customizing data. The following options are available from a technical perspective:
- Standard Batch/Direct input: Sessions can be created and transferred through processing transactions.
SAP provides a method to map fields in master data such as material master and vendor master. The fields in master data can be automatically mapped in standard MAP and the template can be obtained from SAP. It is not possible to skip any field in this method.
- Batch input recording: Data can be directly transferred to SAP database tables.
This method involves making a recording for Master transaction Creation/Change. The recording can be customized to the user's needs and optional fields can be skipped.
- BAPI: Data transfer via interface
This is relevant to business. The BAPI program can be configured to automatically transfer data into the system according to a set schedule.
- IDoc: Data Transfer via Standardized Electronic Messages
This method is used to copy data from one business to another. When transferring data from one server to another, it is necessary that both servers have the same SAP version.
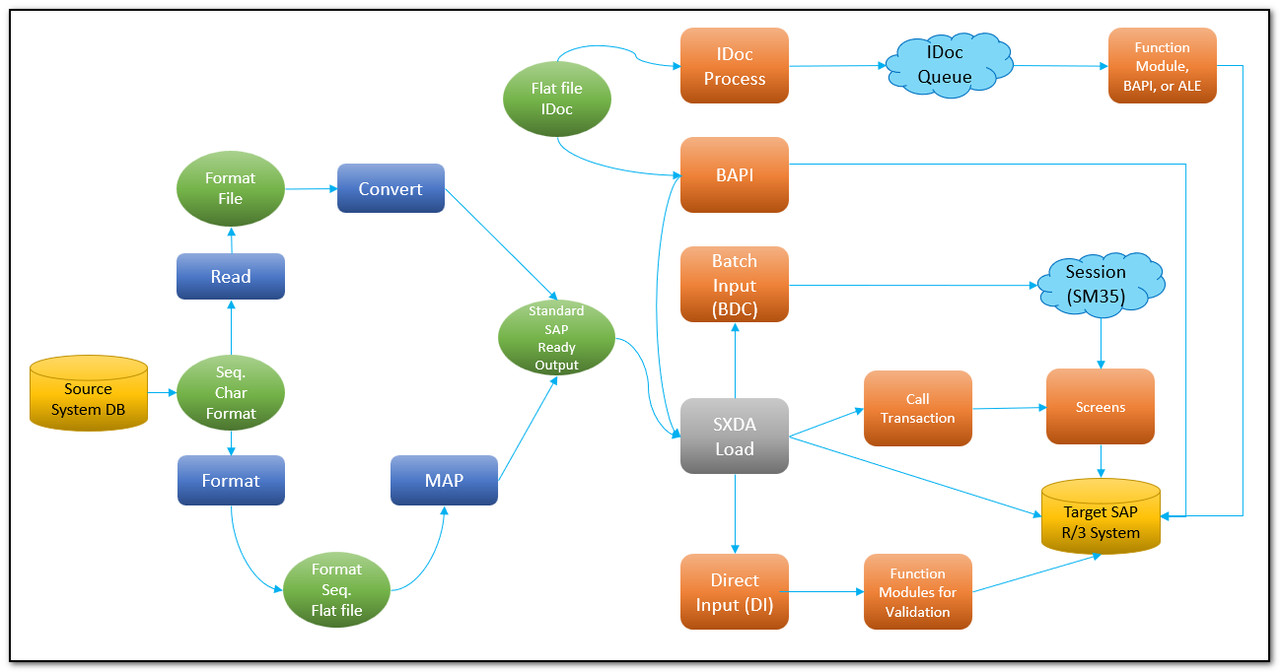
Figure 1 Import techniques in LSMW
LSMW step by step
- To access the LSM Workbench, use transaction code LSMW.
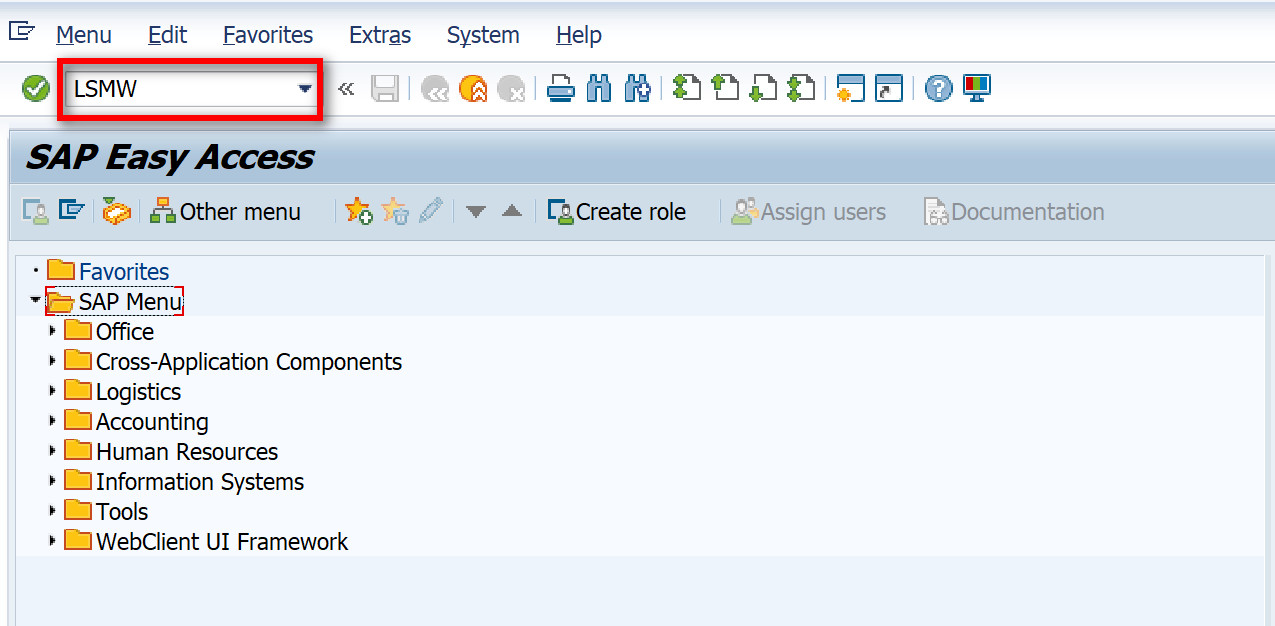
Figure 2 Starting LSM Workbench
- The LSM Workbench displays the information below:
- Project: Your data transfer project requires an ID with a maximum of 10 characters. If you wish to migrate data from multiple legacy systems, you can create a separate project for each.
- Subproject: An ID with up to 10 characters is used as an additional structuring attribute.
- Object: The business object must be named with an ID of up to 10 characters.
- To initiate a new project, press the designated button.

Figure 3 Legacy System Migration Workbench – New Project
- Please provide the Project ID, Subproject ID, and Object ID. Press the “Execute” button.
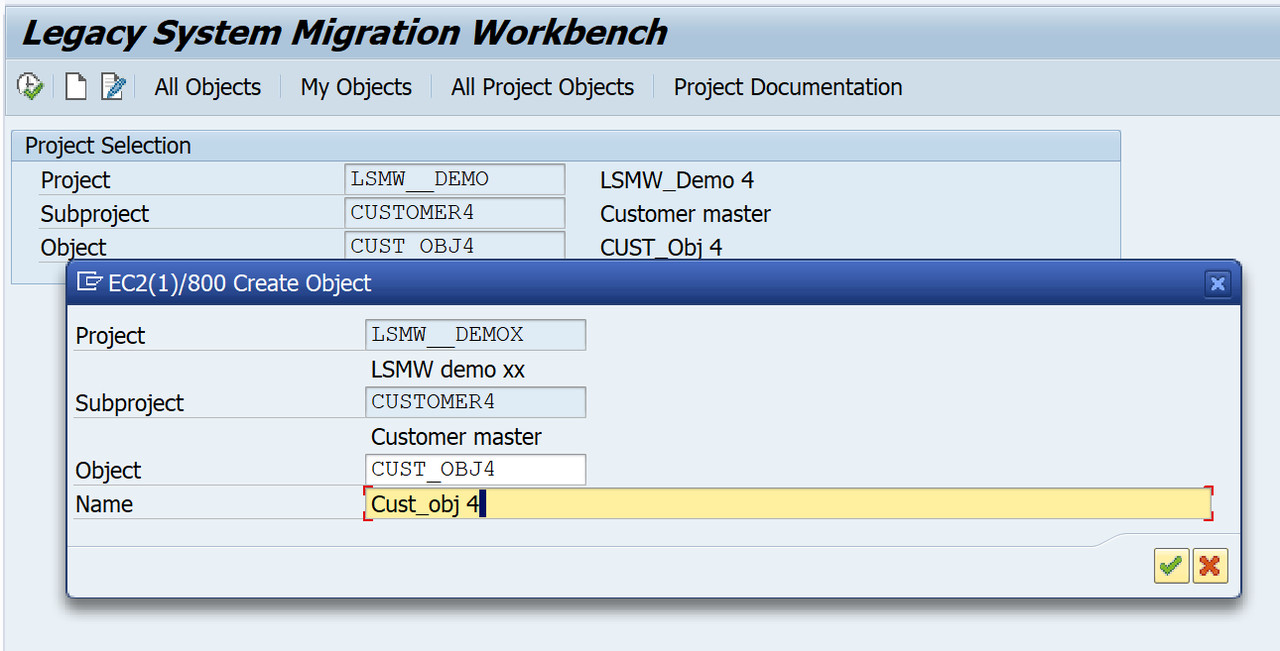
Figure 4 LSMW Project Creation
- The subsequent page contains the Steps of your data migration using LSMW.
Maintain Object Attributes
Use the menu to select the step you want and then press the “Execute” button
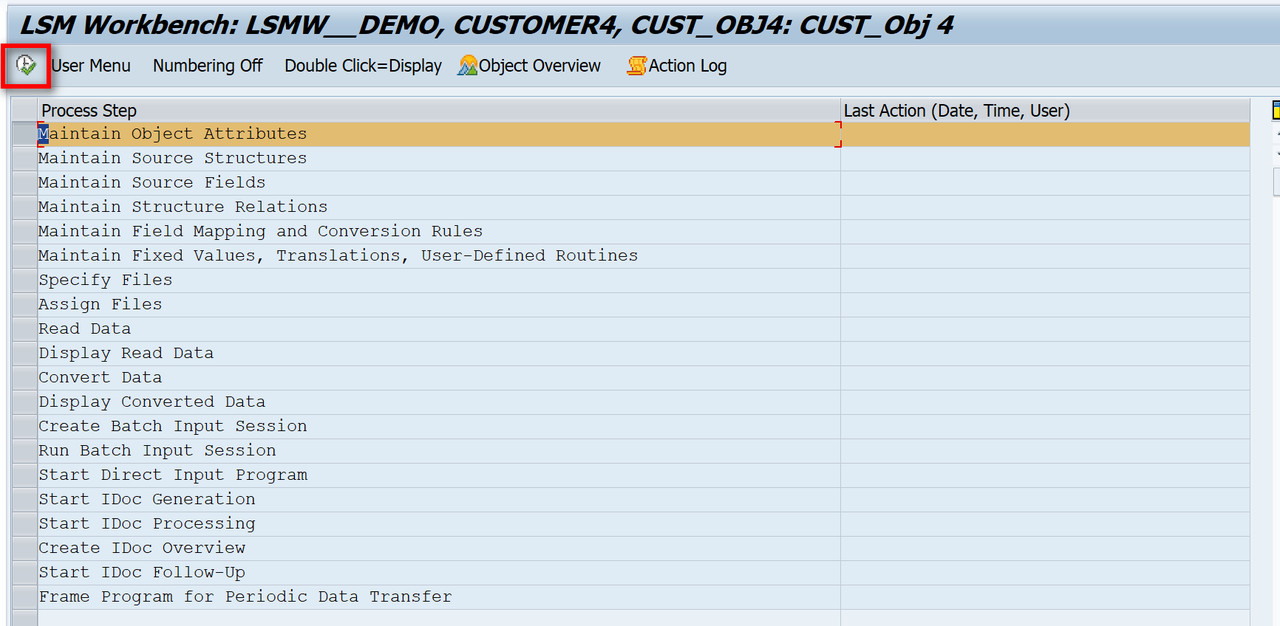
Figure 5 LSMW Menu
- There are four methods of data transfer:
- Standard/ Batch Input
- Batch Input Recording
- BAPIs
- IDOCs
We are looking for the best way to proceed. A standard Master can be loaded using the first method. In other cases, we utilize BAPIs or IDocs. For specialized requirements, we utilize recordings to process the data.
- Select the "Display -Change" option to make your selection.
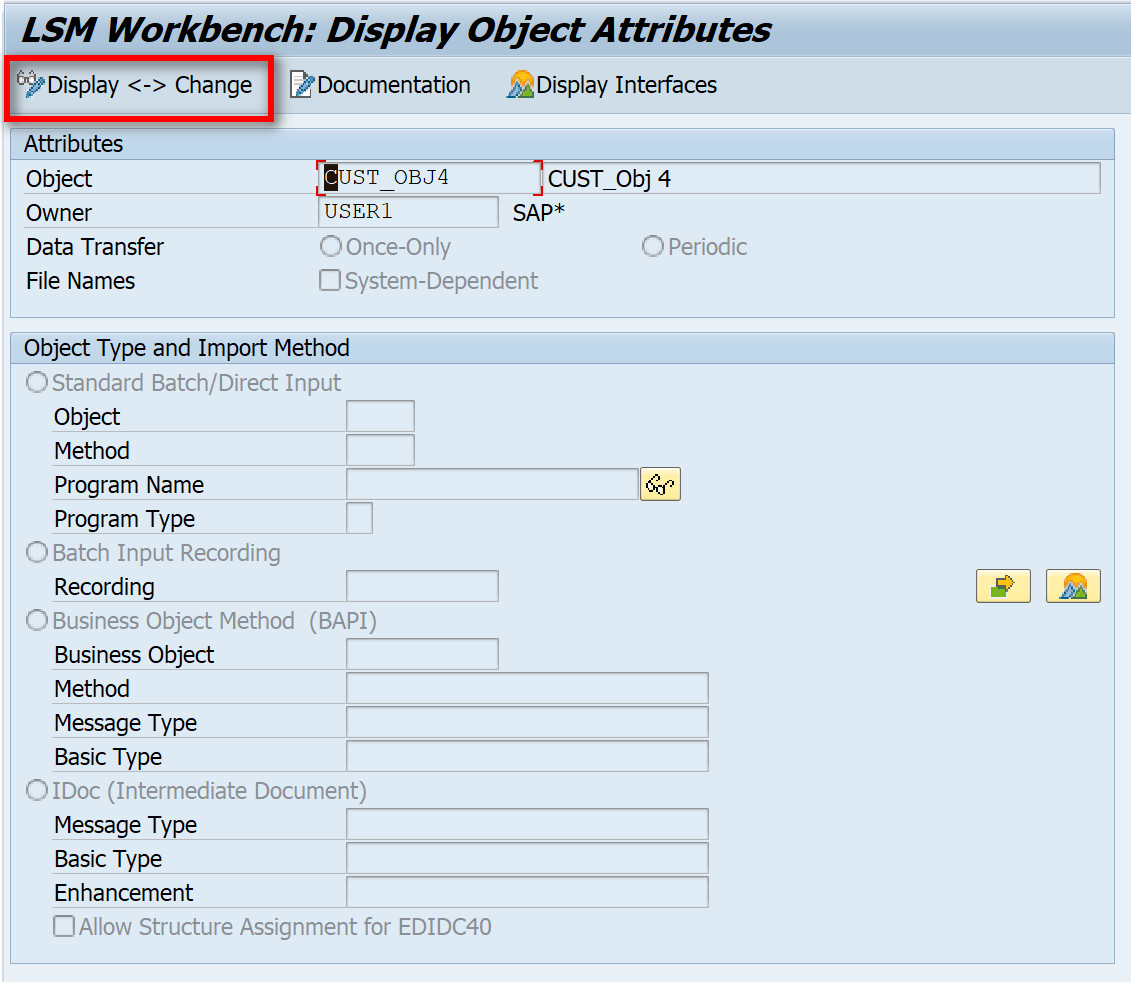
Figure 6 Maintain Object Attributes
- In this case we will use Batch Input Recording.
Please select the "Recording: Overview" as shown below.
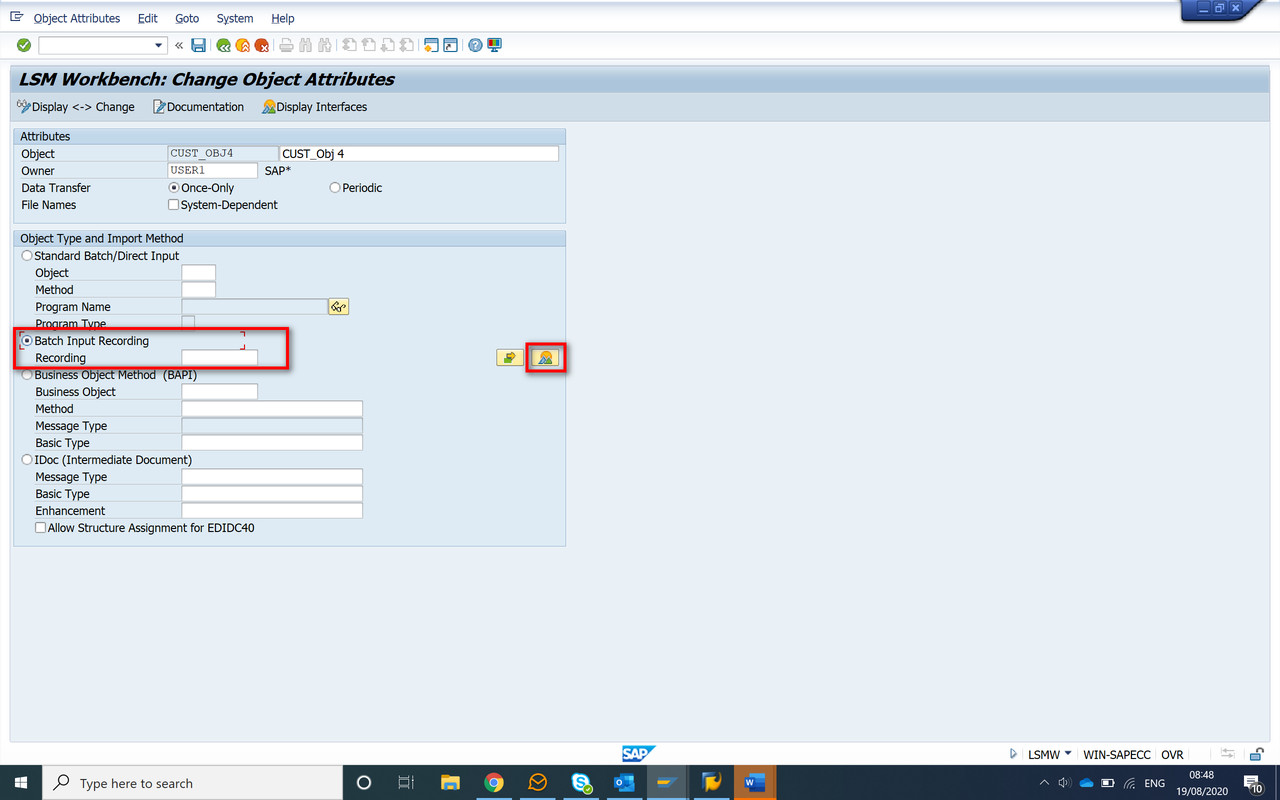
Figure 7 Maintain Object Attributes - Batch Input Recording
- You will be directed to the recording of the project. Select the option "Create Recording" to create a new recording.
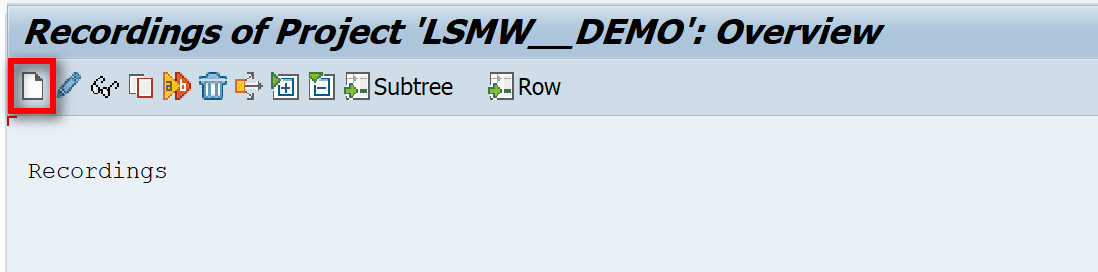
Figure 8 LSMW - Recording of the Project - Overview
Please complete all the necessary information, then click the “Execute” button.
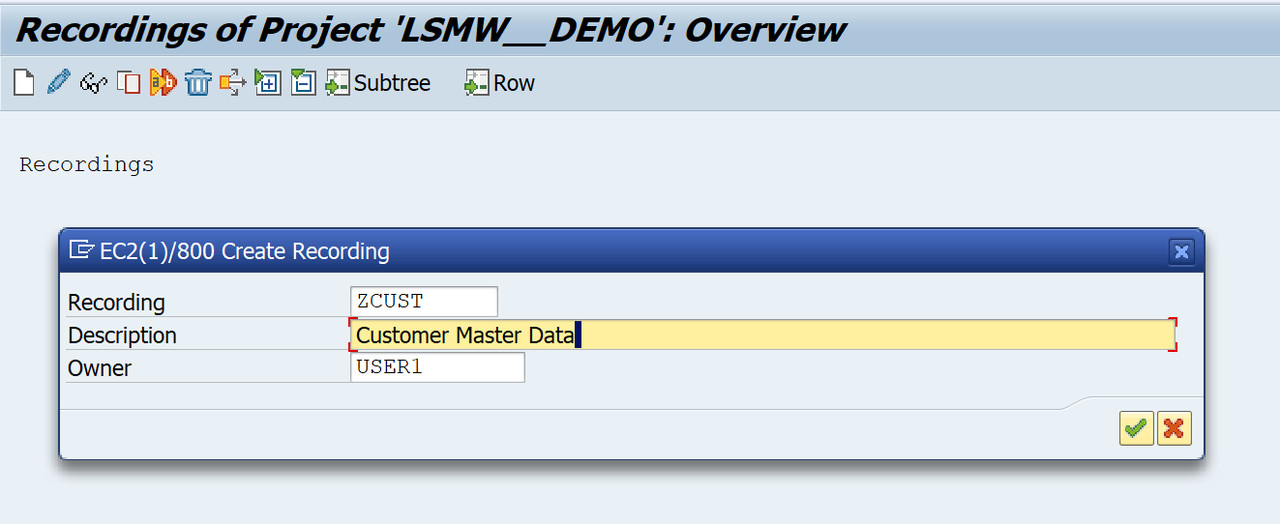
Figure 9 LSMW - Recording of the Project - Creation
- Provide the transaction code for data to be transferred.
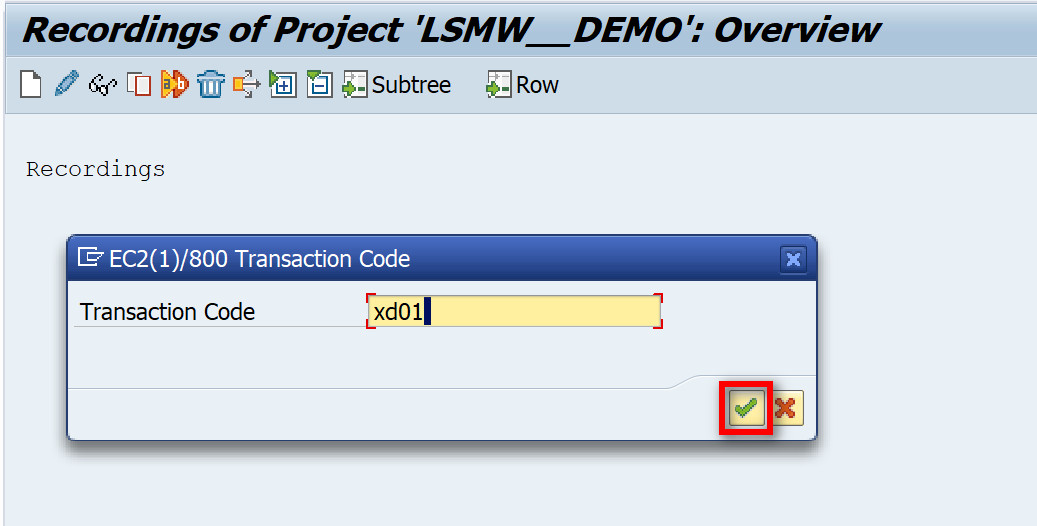
Figure 10 LSMW - Recording of the Project – Transaction Code
You will be directed to the transaction code you selected. Please provide all necessary information.
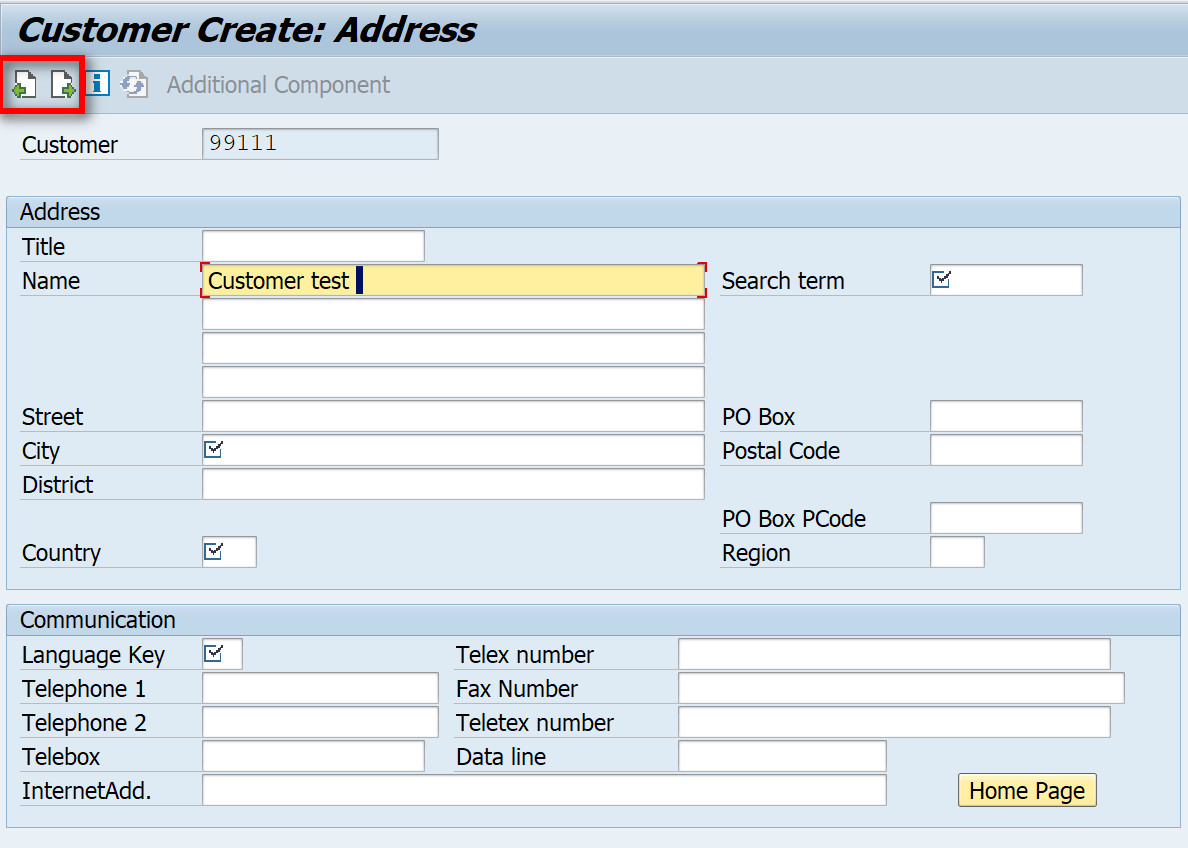
Figure 11 LSMW - Recording of the Project – Customer Creation
- Once you complete the task, you will be returned to the recording page. To view all fields, select the "Default All" button.
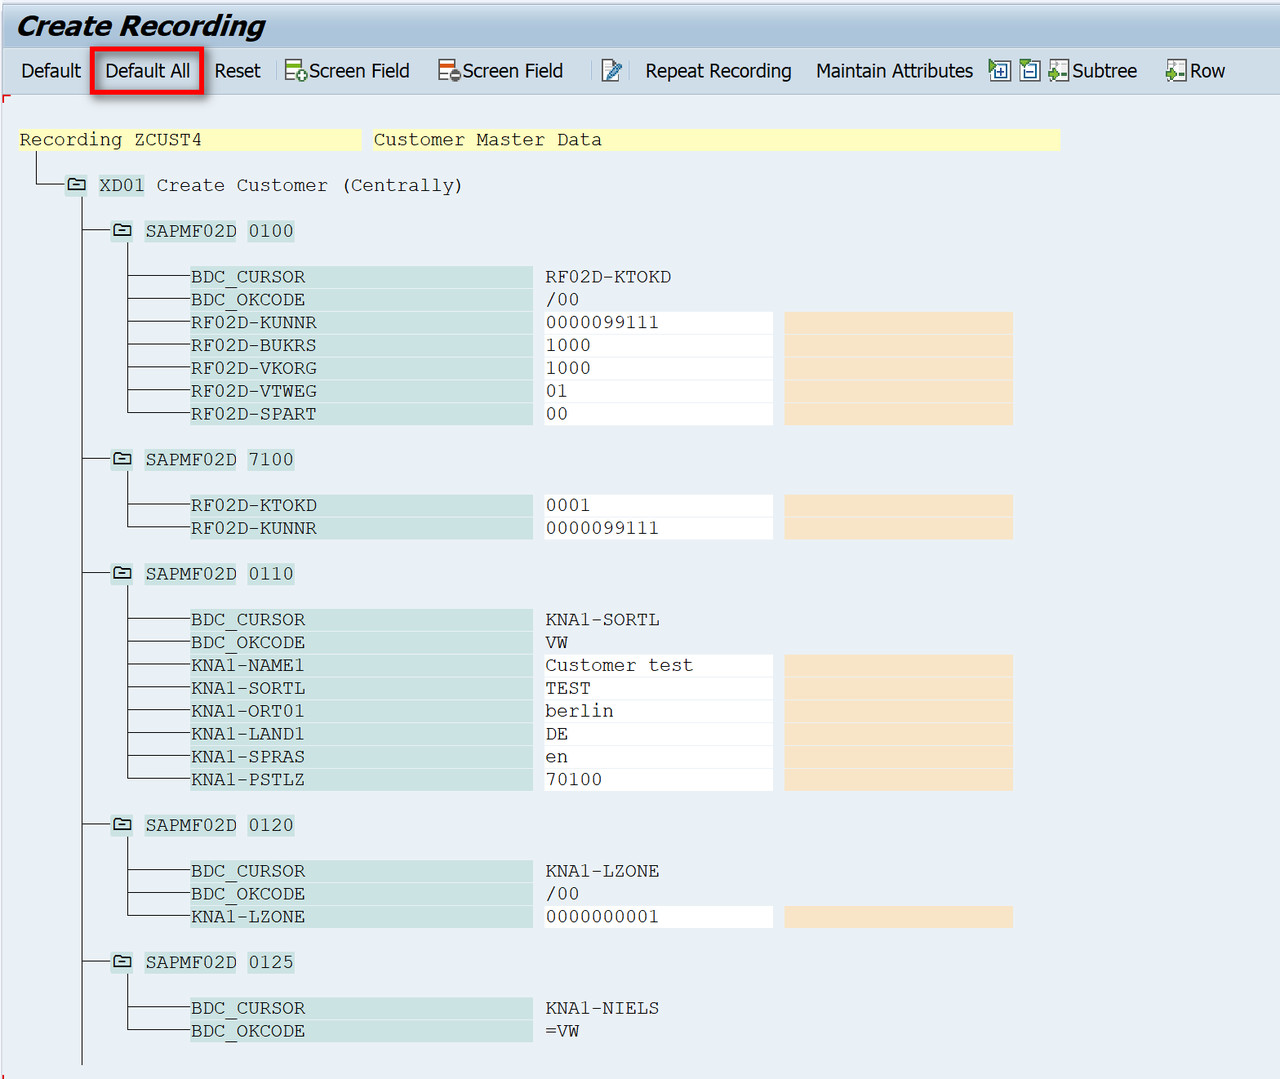
Figure 12 LSMW - Recording of the Project – Recording Page
- Go back and enter the recording name into the specified field and then click “Save”.
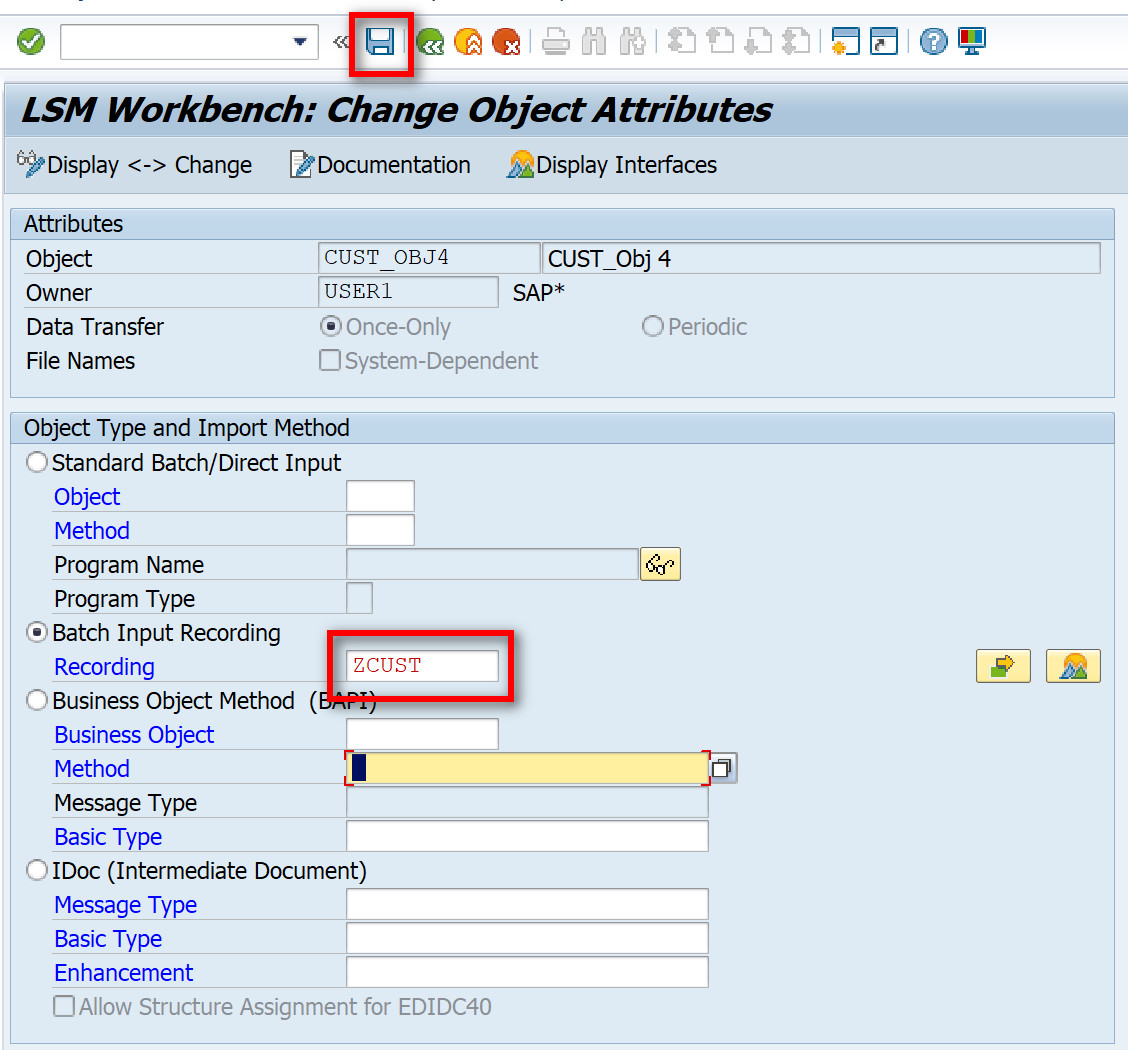
Figure 13 LSMW - Recording of the Project – Recording Completed
- From the LSMW main view, select the next step and press “Execute” button to continue.
Maintain Source Structures
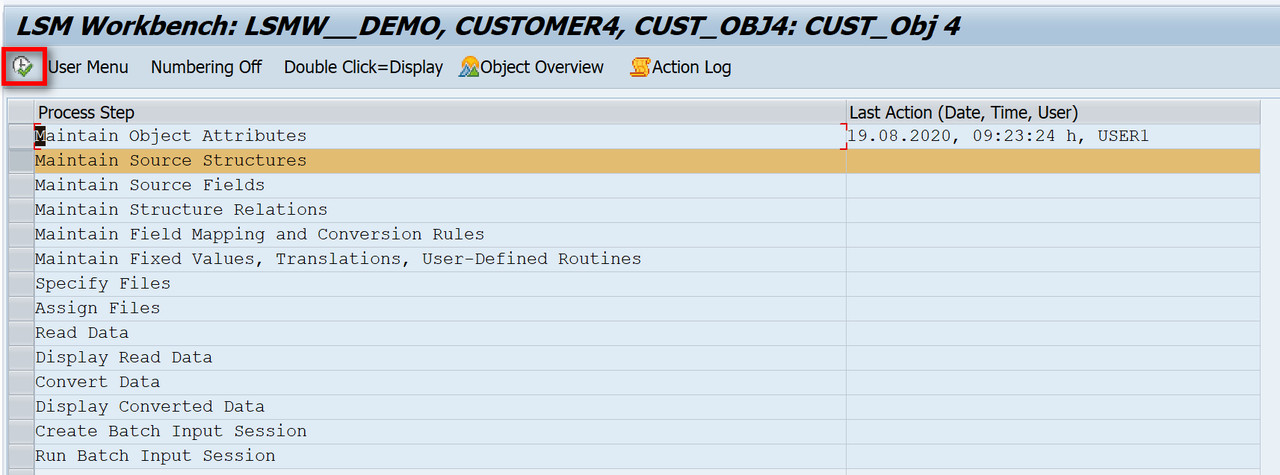
Figure 14 LSMW - Maintain Source Structures
- For every step you take, you need to shift into change mode.
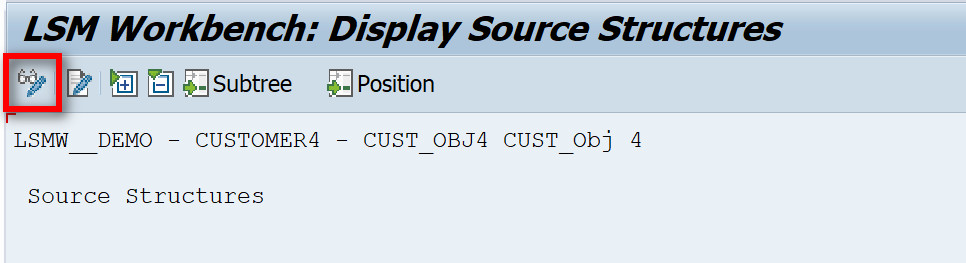
Figure 15 LSMW - Maintain Source Structures – Change Mode
- Create a new source structure
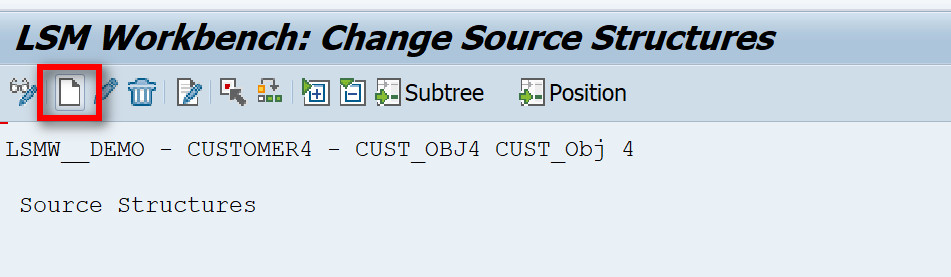
Figure 16 LSMW – New Source Structures Creation
- Enter the name and description, then click on "Continue" button or press Enter.

Figure 17 LSMW – New Source Structures Creation, description
- Go back and choose the next step, which will be covered in the next article.